
Note: This documentation covers both the Free and Pro versions of FundCollector. FundCollector Pro requires the Free version to be installed and kept active at all times. Sections that apply only to Pro are marked with PRO.
Getting Started with FundCollector
Welcome to FundCollector! This guide walks you through installing the plugin, activating your Pro license when applicable, and understanding the admin menu. FundCollector Free includes PayPal payments, including credit and debit cards, bank transfer, customizable forms, donor management, email notifications, spam protection, and diagnostic logs. FundCollector Pro adds Mollie payments, recurring donations, reports, and backup and restore tools PRO.
Whether you are a small nonprofit or an established charity, you can start accepting donations in minutes.
Prerequisites & Requirements
Before you begin, make sure your WordPress site meets these minimum requirements.
System Requirements
- WordPress: 5.8 or higher
- PHP: 7.4 or higher (PHP 8.0+ recommended for optimal performance)
- Database: MySQL 5.6 or higher / MariaDB 10.0 or higher
- cURL: Required for PayPal and Mollie integrations PRO
- SSL Certificate: Required for payment processing
- FundCollector Free version 1.5.0 or higher must be installed and active for FundCollector Pro PRO
What You Will Need
- WordPress admin access
- FundCollector Pro license key, purchased at fundcollector.net/pricing/ PRO
- Mollie account, Europe only, for Mollie payments and recurring donations PRO – create one here
- PayPal Business account for PayPal wallet and credit or debit card donations. PayPal recurring donations are also supported worldwide PRO – create one here
- Google reCAPTCHA v3 keys (optional, for spam protection)
- SMTP credentials (optional, for reliable email delivery)
Quick Start Overview
Here is the high-level workflow to get your donation system up and running:
- Install and activate FundCollector from the WordPress Plugin Directory. Install and activate FundCollector Pro afterwards if you have a license PRO
- Activate your Pro license to enable automatic updates PRO
- Complete the Setup Wizard, or reopen it any time from Settings with Run Setup Wizard
- Configure General Settings, including your currency, country, and essential pages
- Set up Payment Methods: PayPal, including credit and debit cards, and bank transfer. Mollie is available in Pro PRO
- Enable recurring donations through PayPal or Mollie PRO
- Customize Email Notifications
- Enable Security features such as honeypot and reCAPTCHA
- Create your first form or use the pre-filled default form
- Add the form to a page on your website with the Gutenberg block or shortcode
- Test and launch: make a test donation, then go live
- Optional: use Settings → Logs for diagnostics or to generate a temporary support access link
If you install Free first and then activate Pro as a single plugin, the Setup Wizard opens after the Pro activation with the available Pro payment options. If you activate plugins in bulk, WordPress does not open the wizard automatically. Open FundCollector → Settings and select Run Setup Wizard instead. The detailed wizard guide is on the General Settings page.
1. Install FundCollector Free
Automatic Installation
This is the simplest method of installing a plugin. To add a plugin using the built-in plugin installer:
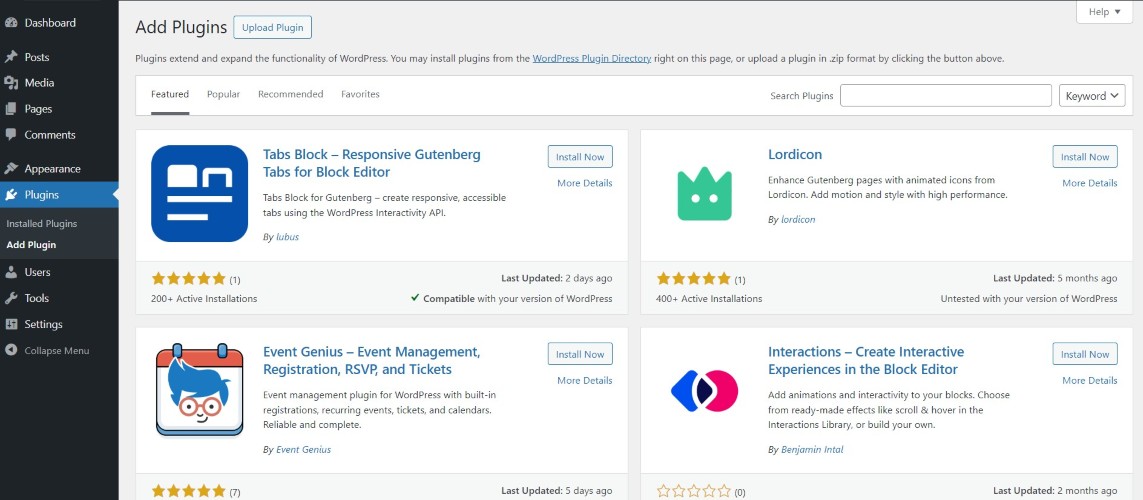
- Log in to your WordPress dashboard, navigate to the Plugins menu, and click “Add Plugin”.

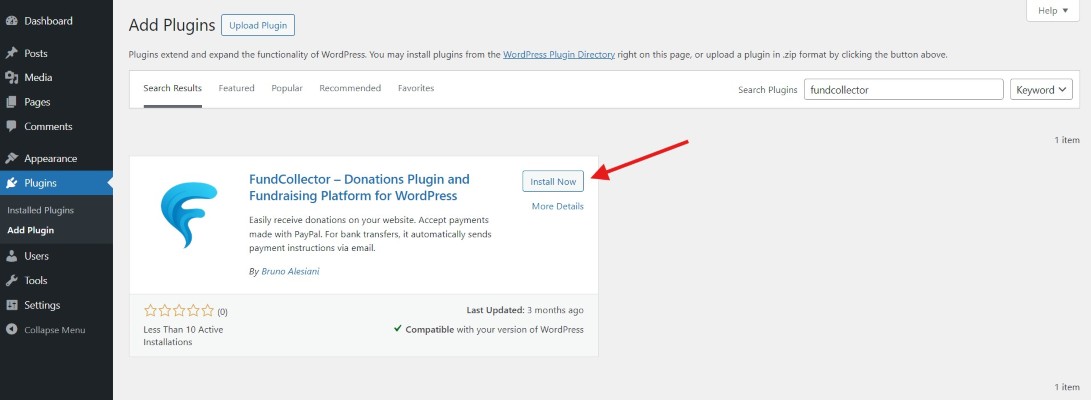
Finding plugin - Type “fundcollector” in the search field. The FundCollector plugin box will appear.
Type fundcollector - Click the “Install now” button inside the box.
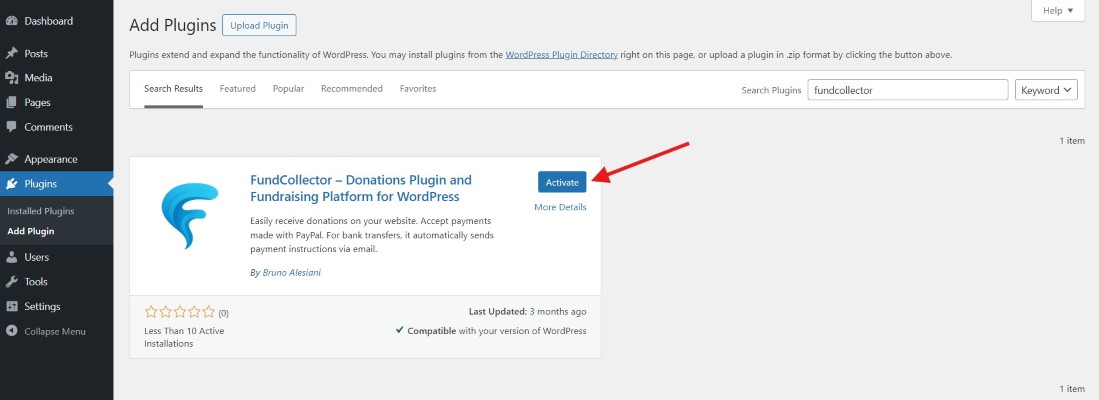
Click on install now - Once the automatic installation is complete, click the “Activate” button.
Click on activate

Manual Installation
This method may be required if the server hosting WordPress does not allow automatic installations. It is recommended for experts and developers because it relies on file transfer through SFTP.
- Download the FundCollector zip file from the WordPress Plugin Directory and unzip it locally.
- Transfer the extracted folder to the
/wp-content/pluginsdirectory of your WordPress site through SFTP or a remote file manager. - From the Plugins menu in the Administration Screen, click “Activate” for the transferred plugin.
2. Install FundCollector Pro PRO
FundCollector Pro requires FundCollector Free version 1.5.0 or higher to be installed and activated first.
- Download the FundCollector Pro zip file from fundcollector.net after purchasing your license.
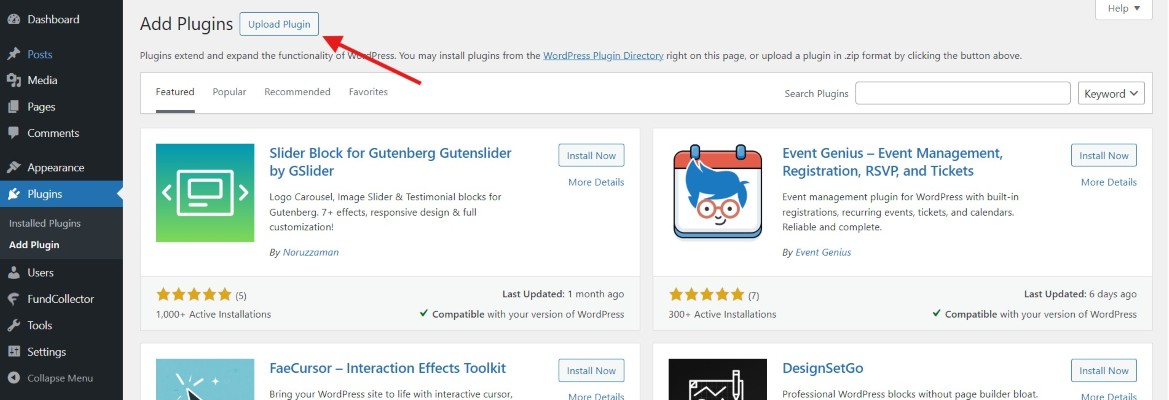
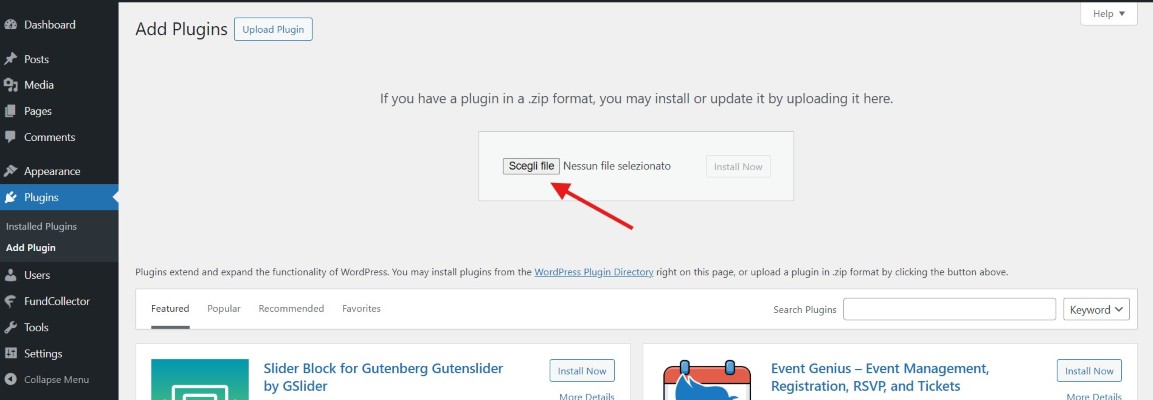
- In your WordPress dashboard, navigate to Plugins → Add Plugin → Upload Plugin.
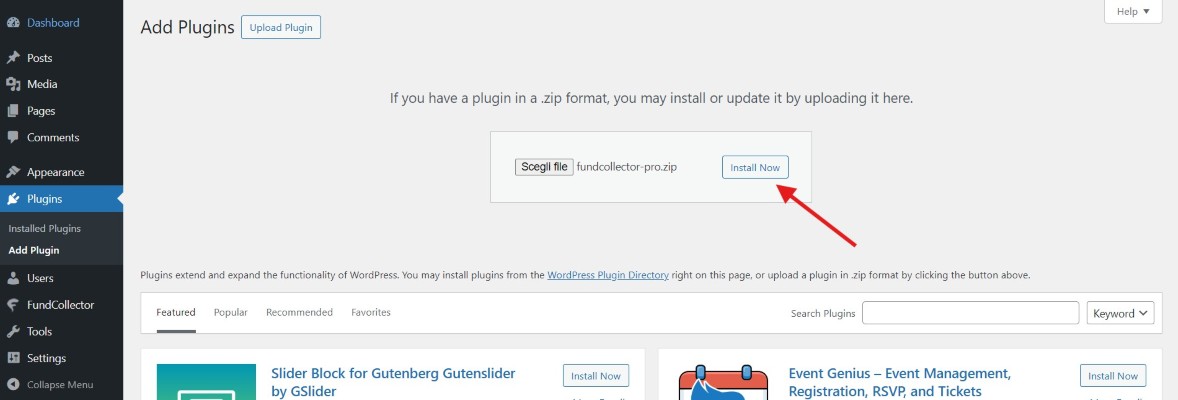
Upload plugin - Click “Choose File”, select the downloaded zip file, and click “Install Now”.
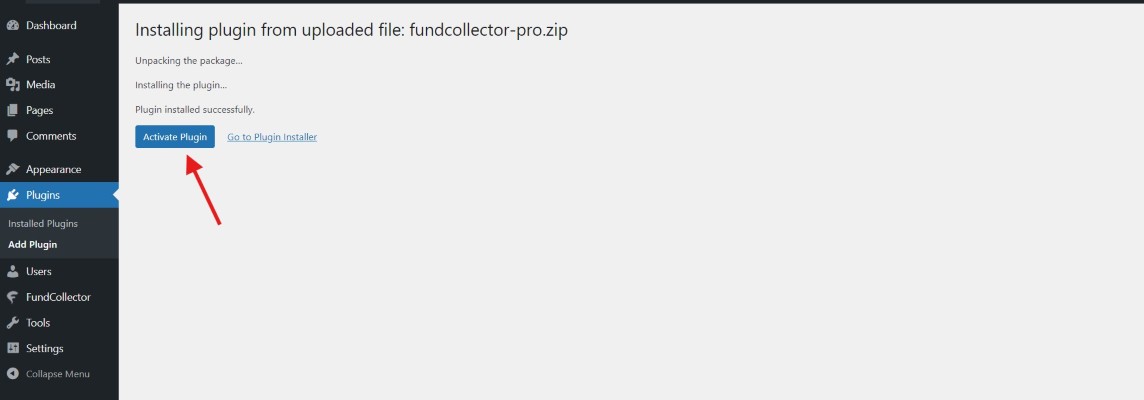
Choose file Install now - Once installation is complete, click the “Activate Plugin” button.
Activate plugin
After a normal, single-plugin activation of Pro, FundCollector redirects an administrator to the Setup Wizard. If you activate several plugins in bulk, WordPress skips this redirect. Open FundCollector → Settings and select Run Setup Wizard instead.
3. License Activation PRO
After installing FundCollector Pro, activate your license to receive automatic updates and priority support.
How to Activate Your License
- Purchase a license at fundcollector.net/pricing/.
- After purchase, you will receive your license key by email.
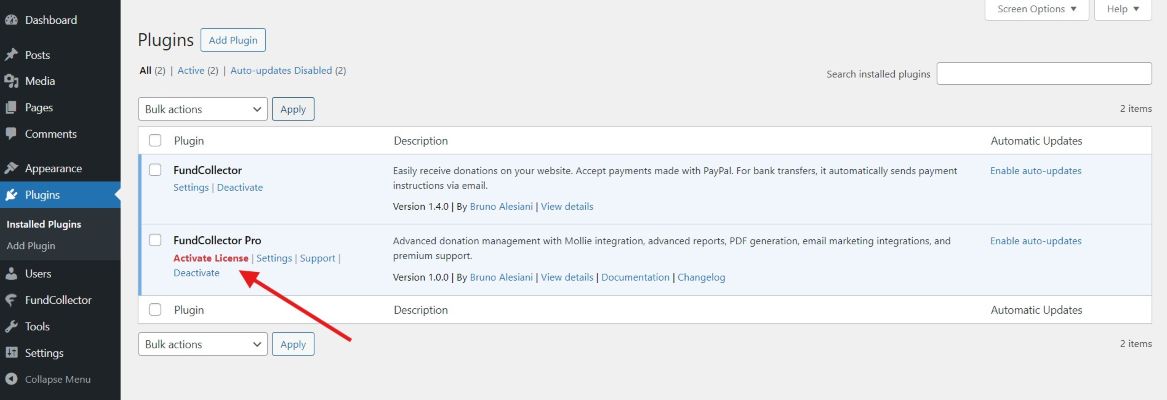
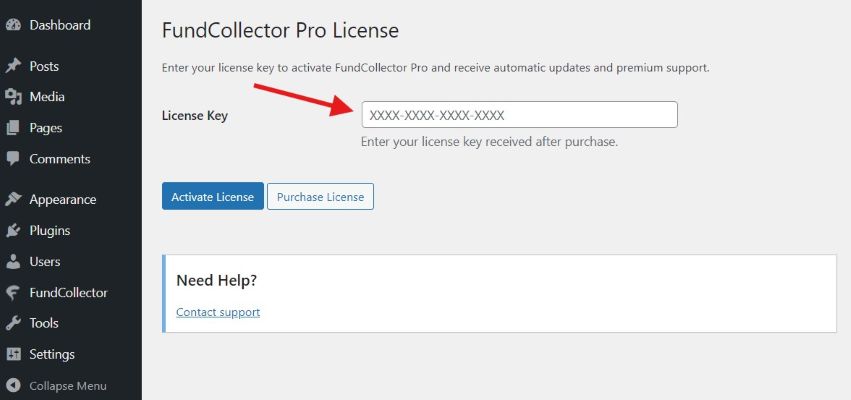
- Click the “Plugins” menu item in your WordPress dashboard, then click “Activate License” on the FundCollector Pro plugin.
Activate License - Enter your license key in the “License Key” field.
Insert License Key - Click “Activate License”.
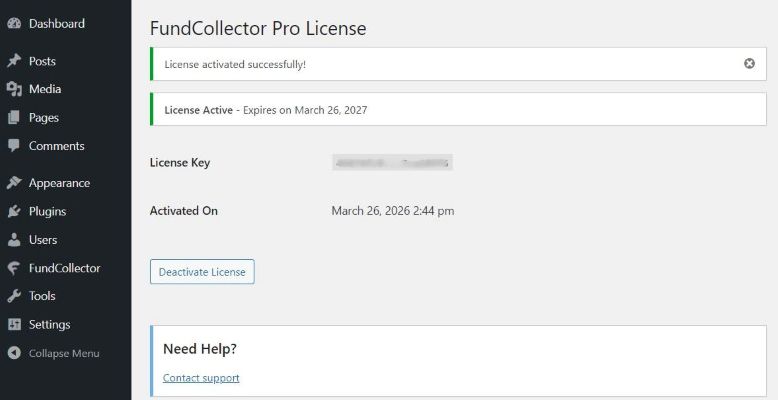
- The status will change to “Active” with your expiration date.
License activated successfully
License Status
- Active: Your license is valid. You will receive automatic updates and have access to priority support.
- Expired: Your license has expired. All Pro features remain active, but automatic updates are paused. Renew at fundcollector.net/pricing/.
- Not activated: A license key has not been entered. All Pro features are available, but updates require manual installation.
Automatic Updates
With an active license, FundCollector Pro integrates with the WordPress update system. When a new version is available, you will see the standard WordPress update notification and can update with a single click.
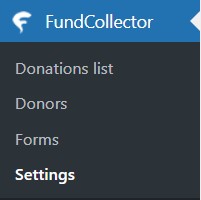
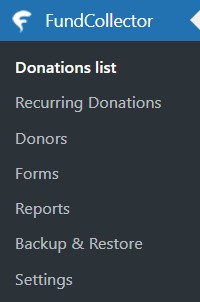
4. FundCollector Menu Items
Once activated, FundCollector adds a new menu to your WordPress admin dashboard. FundCollector Pro adds Recurring Donations, Reports, and Backup & Restore PRO to the base menu.
Donations List
Your central hub for viewing and managing all received donations, including recurring donations PRO:
- View all donations with status indicators: completed, pending, cancelled, failed, expired, refunded, and manual check
- Filter and search donations by payment method, including Mollie PRO, date, status, donor name, or amount
- View detailed information for each donation
- Soft-delete donations you no longer need by moving them to the trash
Recurring Donations PRO
A dedicated section to manage all recurring subscriptions:
- View all active, cancelled, and expired subscriptions
- See subscription details: donor, amount, frequency, status, and next payment date
- Cancel subscriptions directly from the admin panel
- Retry failed subscription creation where available
Donors
A dedicated section to view and manage all your donors:
- See all donors with their total donation amount and number of donations
- View individual donor profiles with full donation history, including recurring donations PRO
- Sort donors by name, email, total donated, or date
Forms
The form builder interface where you create and customize donation forms:
- Create multiple forms for different campaigns
- Customize form fields and design
- Generate shortcodes and use Gutenberg blocks
- Preview forms before publishing
Reports PRO
Reporting and analytics:
- Generate comprehensive donation reports with custom date ranges
- Filter by payment method, status, and donation frequency
- Export reports to PDF or CSV format
- View donation statistics and payment breakdowns
Backup & Restore PRO
Data protection tools:
- Create full backups of FundCollector data, including donations, donors, recurring subscriptions, forms, and settings
- Download backups as zip files
- Restore data from a previous backup
Settings
Comprehensive configuration panel with the following tabs:
- General: currency, location, and pages
- Payment Methods: PayPal and bank transfer, plus Mollie PRO
- Email: customize email notifications and delivery settings, including Mollie notifications PRO
- Security: honeypot and reCAPTCHA settings
- Advanced: delete plugin data on uninstall
- Logs: view and manage diagnostic logs, and generate an optional support access link
- How to use: a quick-start guide and Pro overview directly in the admin PRO
Use Run Setup Wizard any time from Settings if you want a guided first configuration. With Pro active, the wizard includes the available Pro payment options, including Mollie Connect when it is available. For detailed wizard instructions, see General Settings.