
Note: This documentation covers both the Free and Pro versions of FundCollector. FundCollector Pro requires the Free version to be installed and kept active at all times. Sections that apply only to Pro are marked with PRO.
How to Create a Donation Form
This guide explains how to create and configure donation forms in WordPress with FundCollector.
Overview
FundCollector stores each donation layout as a form. Every form has:
- A Form ID used in the shortcode and Donation Form block.
- Its own fields, design options, and public-facing text.
- A shortcode such as
[fundcollector_donation_form id=your_id]for pages and posts.
You can use the built-in Default donation form or create additional forms for different campaigns and pages.
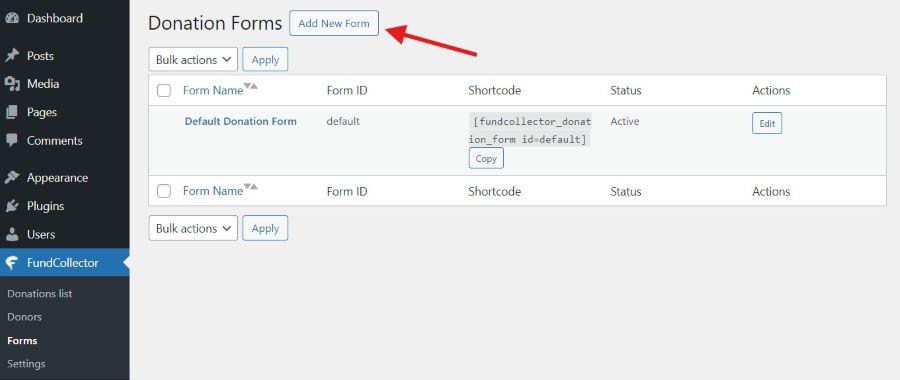
Open the Forms screen
- Log in to the WordPress admin (
/wp-admin/). - Open FundCollector → Forms.
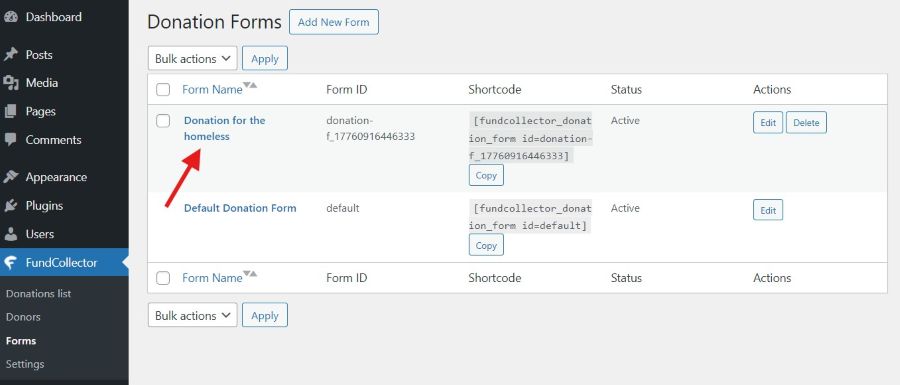
The Donation Forms screen shows the form table when forms exist.
Free version
Pro version PRO
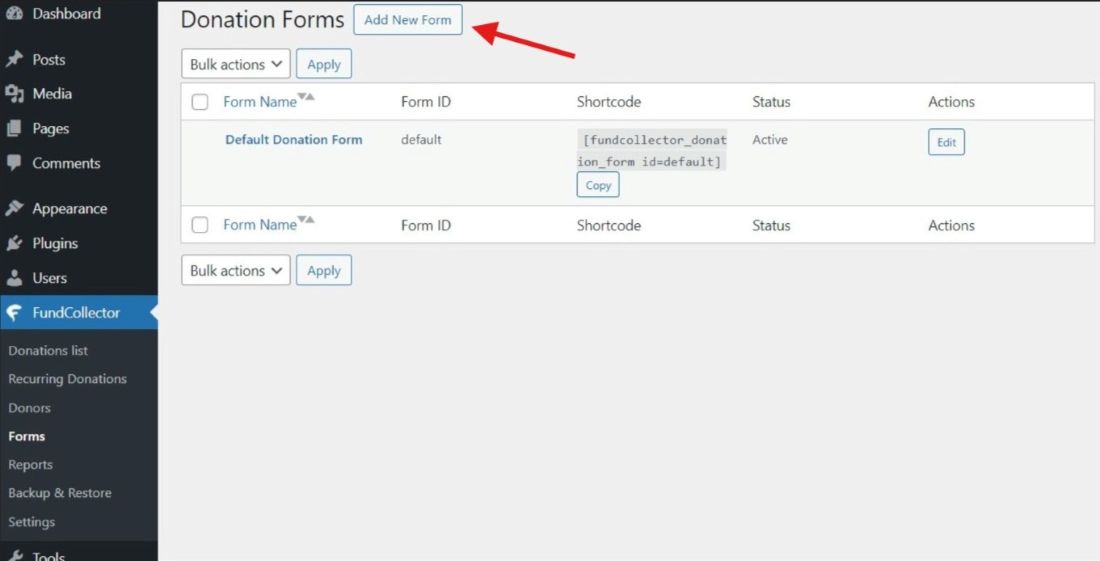
Donation Forms list
When at least one form exists, the list shows Form Name, Form ID, the exact Shortcode with a Copy button, Status, and Actions. Click a sortable column header to change its order.
- Active and Inactive identify whether a form can appear on the front end.
- Use Edit to configure a form.
- Use Delete for eligible custom forms. The default form cannot be deleted or selected for bulk deletion.
- Add New Form appears next to the page title. You can also select eligible forms and use Bulk actions → Delete.
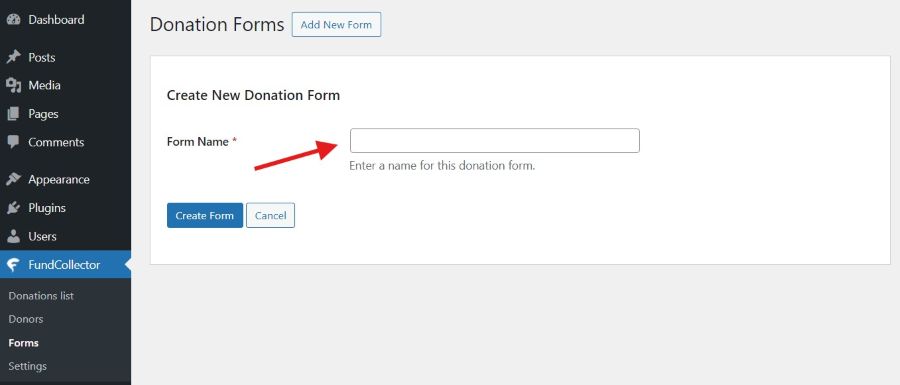
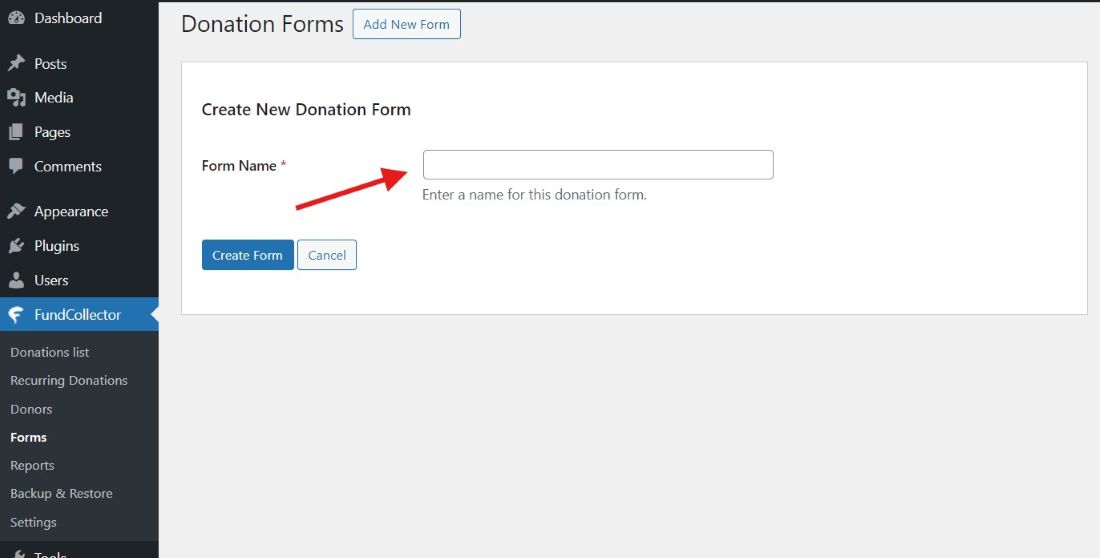
Create a new form
- Click Add New Form, or Create Your First Form on the empty state.
- Enter a required Form Name. It helps you identify the form in the admin; set the donor-facing title separately in Purpose of donation / Name.
- Click Create Form, or Cancel to return to the list.
WordPress then opens the form editor.
Free version
Pro version PRO
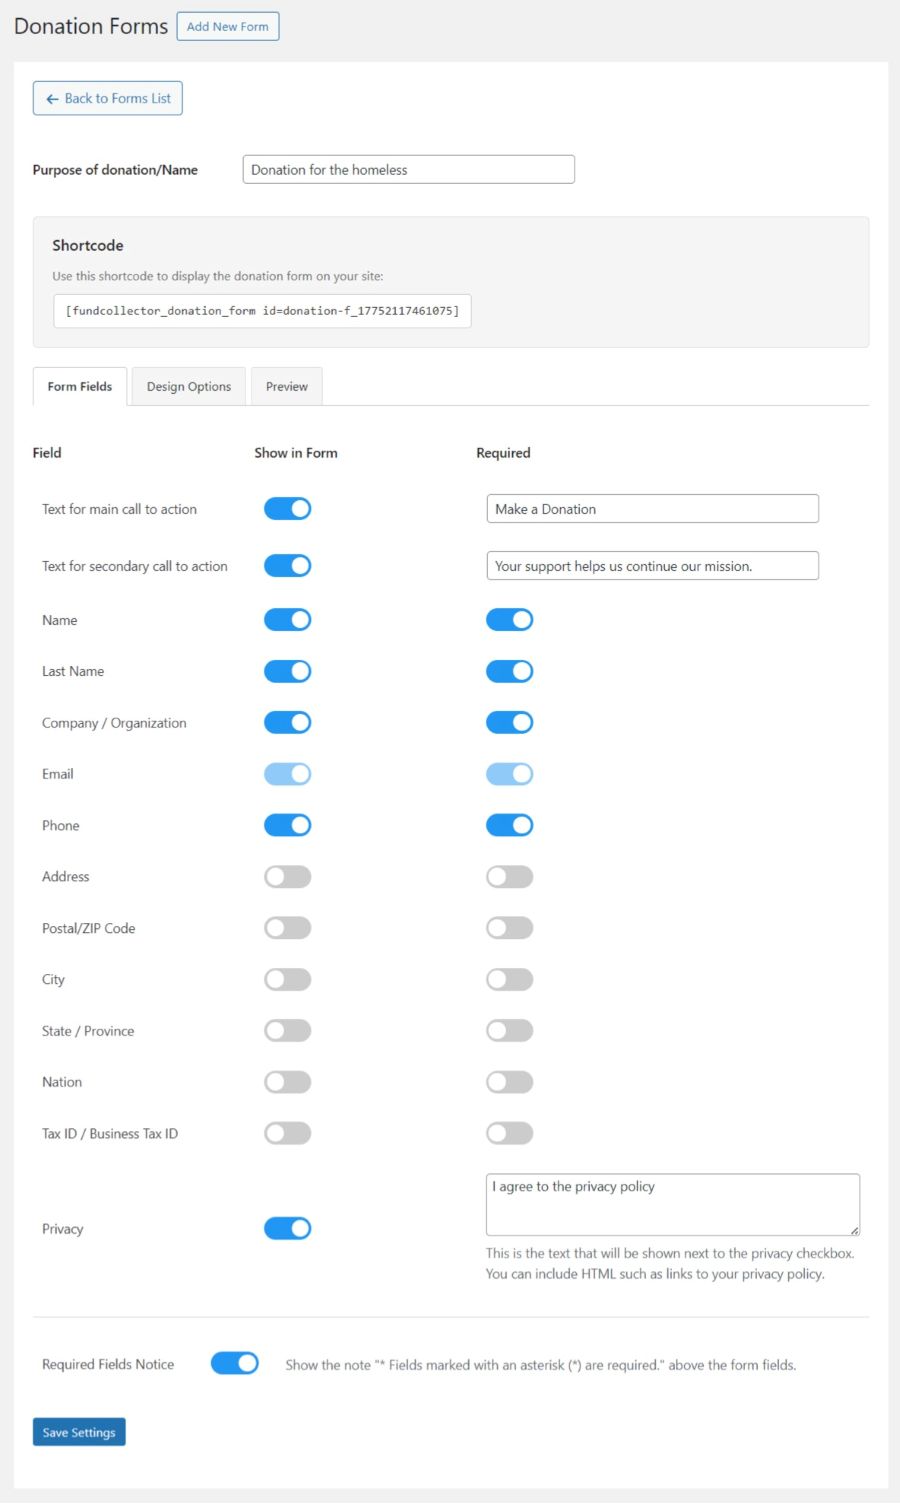
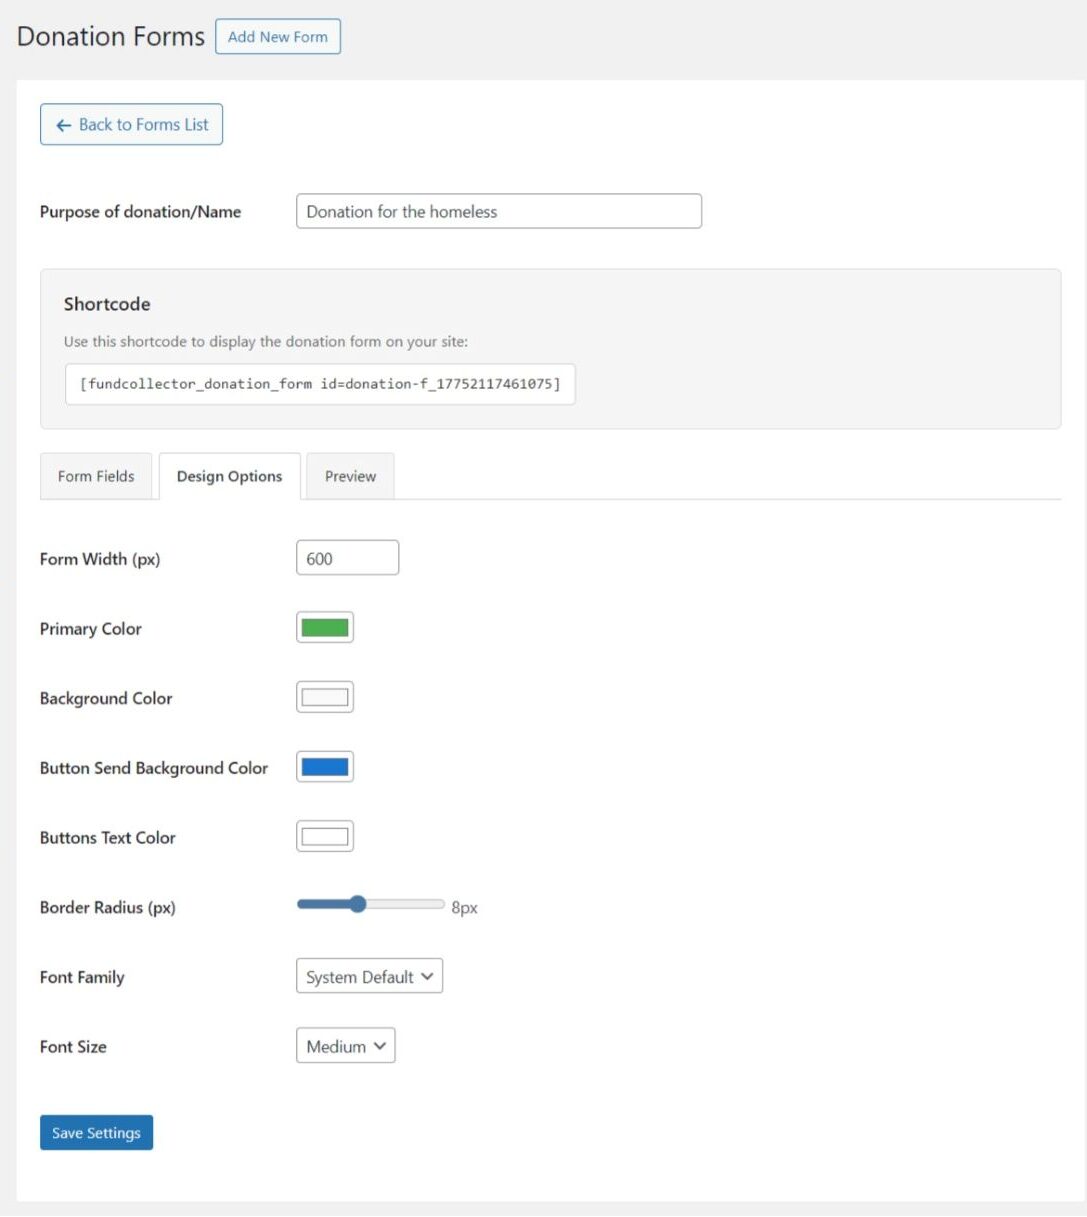
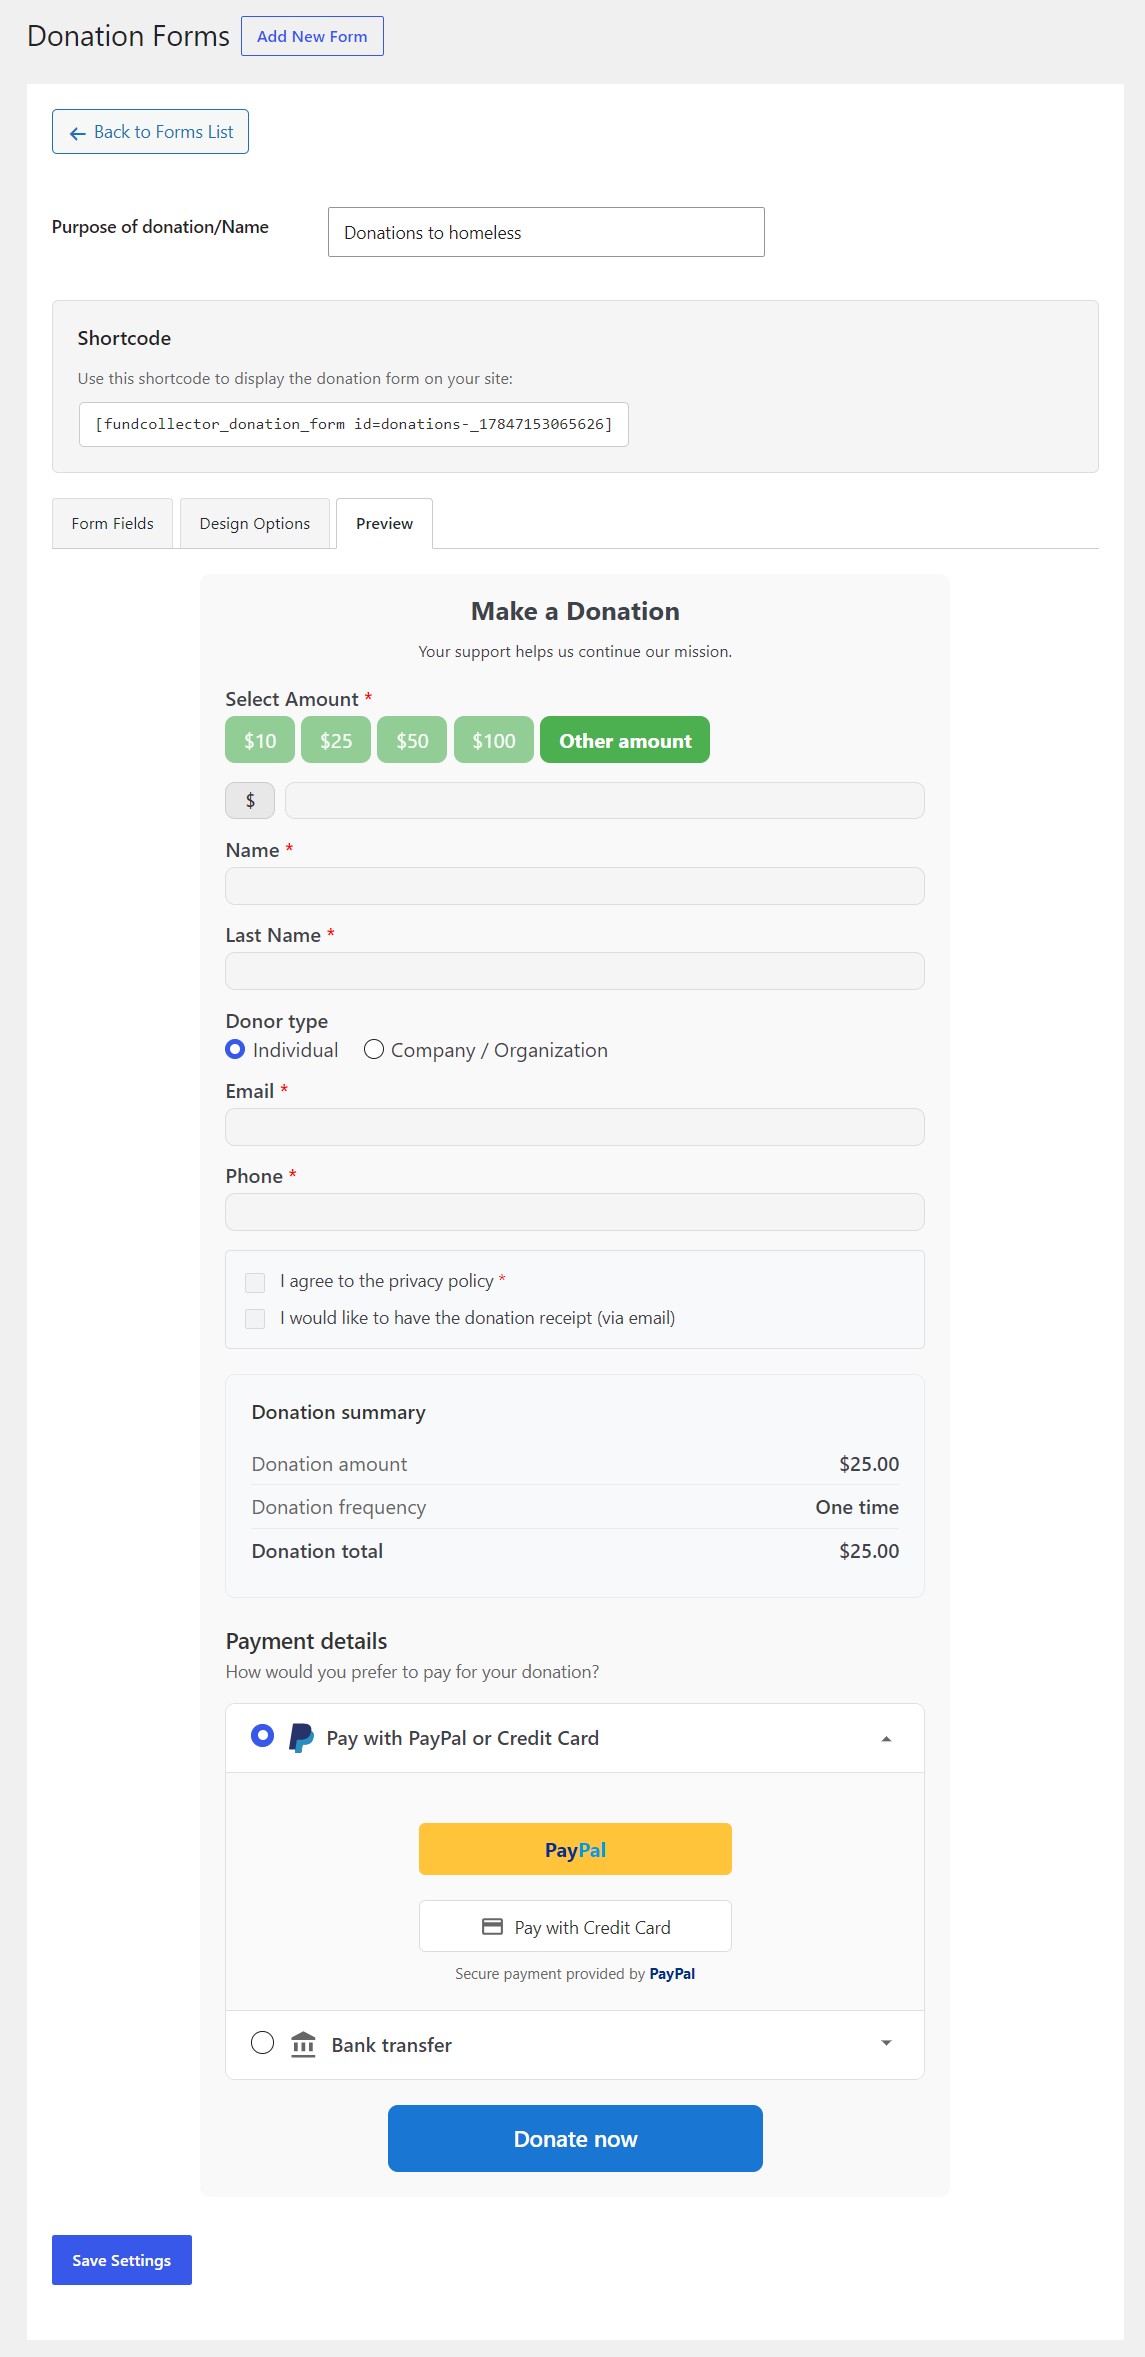
Form editor
At the top of the editor are Back to Forms List, Purpose of donation / Name, and the read-only shortcode. The default form uses id=default, so you can embed it with [fundcollector_donation_form id=default] or simply [fundcollector_donation_form].
Free version
Pro version PRO
Tab: Form Fields
Three tabs appear: Form Fields, Design Options, Preview. Open Form Fields first.
Calls to action
- Text for main call to action – toggle Show in Form; set the headline text (default idea: “Make a Donation”).
- Text for secondary call to action – optional supporting line under the title.
Donor fields
A table lists fields such as Name, Last Name, Company / Organization, Email, Phone, Address, and address-related fields, Tax ID, and more.
For each row:
- Show in Form – include or hide the field.
- Required – donor must fill the field before submitting.
Email is always shown and required (you cannot turn it off).
Privacy
- Privacy – toggle visibility; edit the privacy text in the textarea. You may use HTML (for example a link to your privacy policy page). This text appears next to the privacy consent checkbox on the front end.
Required fields notice
Below the main field table, Required Fields Notice toggles whether the form shows the standard note that asterisk-marked fields are required.
Tab: Design Options
Use Design Options to align the form with your theme:
- Form Width (px) – between 300 and 1200.
- Primary Color – accent for amounts and highlights.
- Background Color – form panel background.
- Button Send Background Color and Buttons Text Color – main donate button.
- Border Radius (px) – slider with live value.
- Font Family – e.g. System Default, Arial, Verdana, Helvetica, Roboto.
- Font Size – Small / Medium / Large.
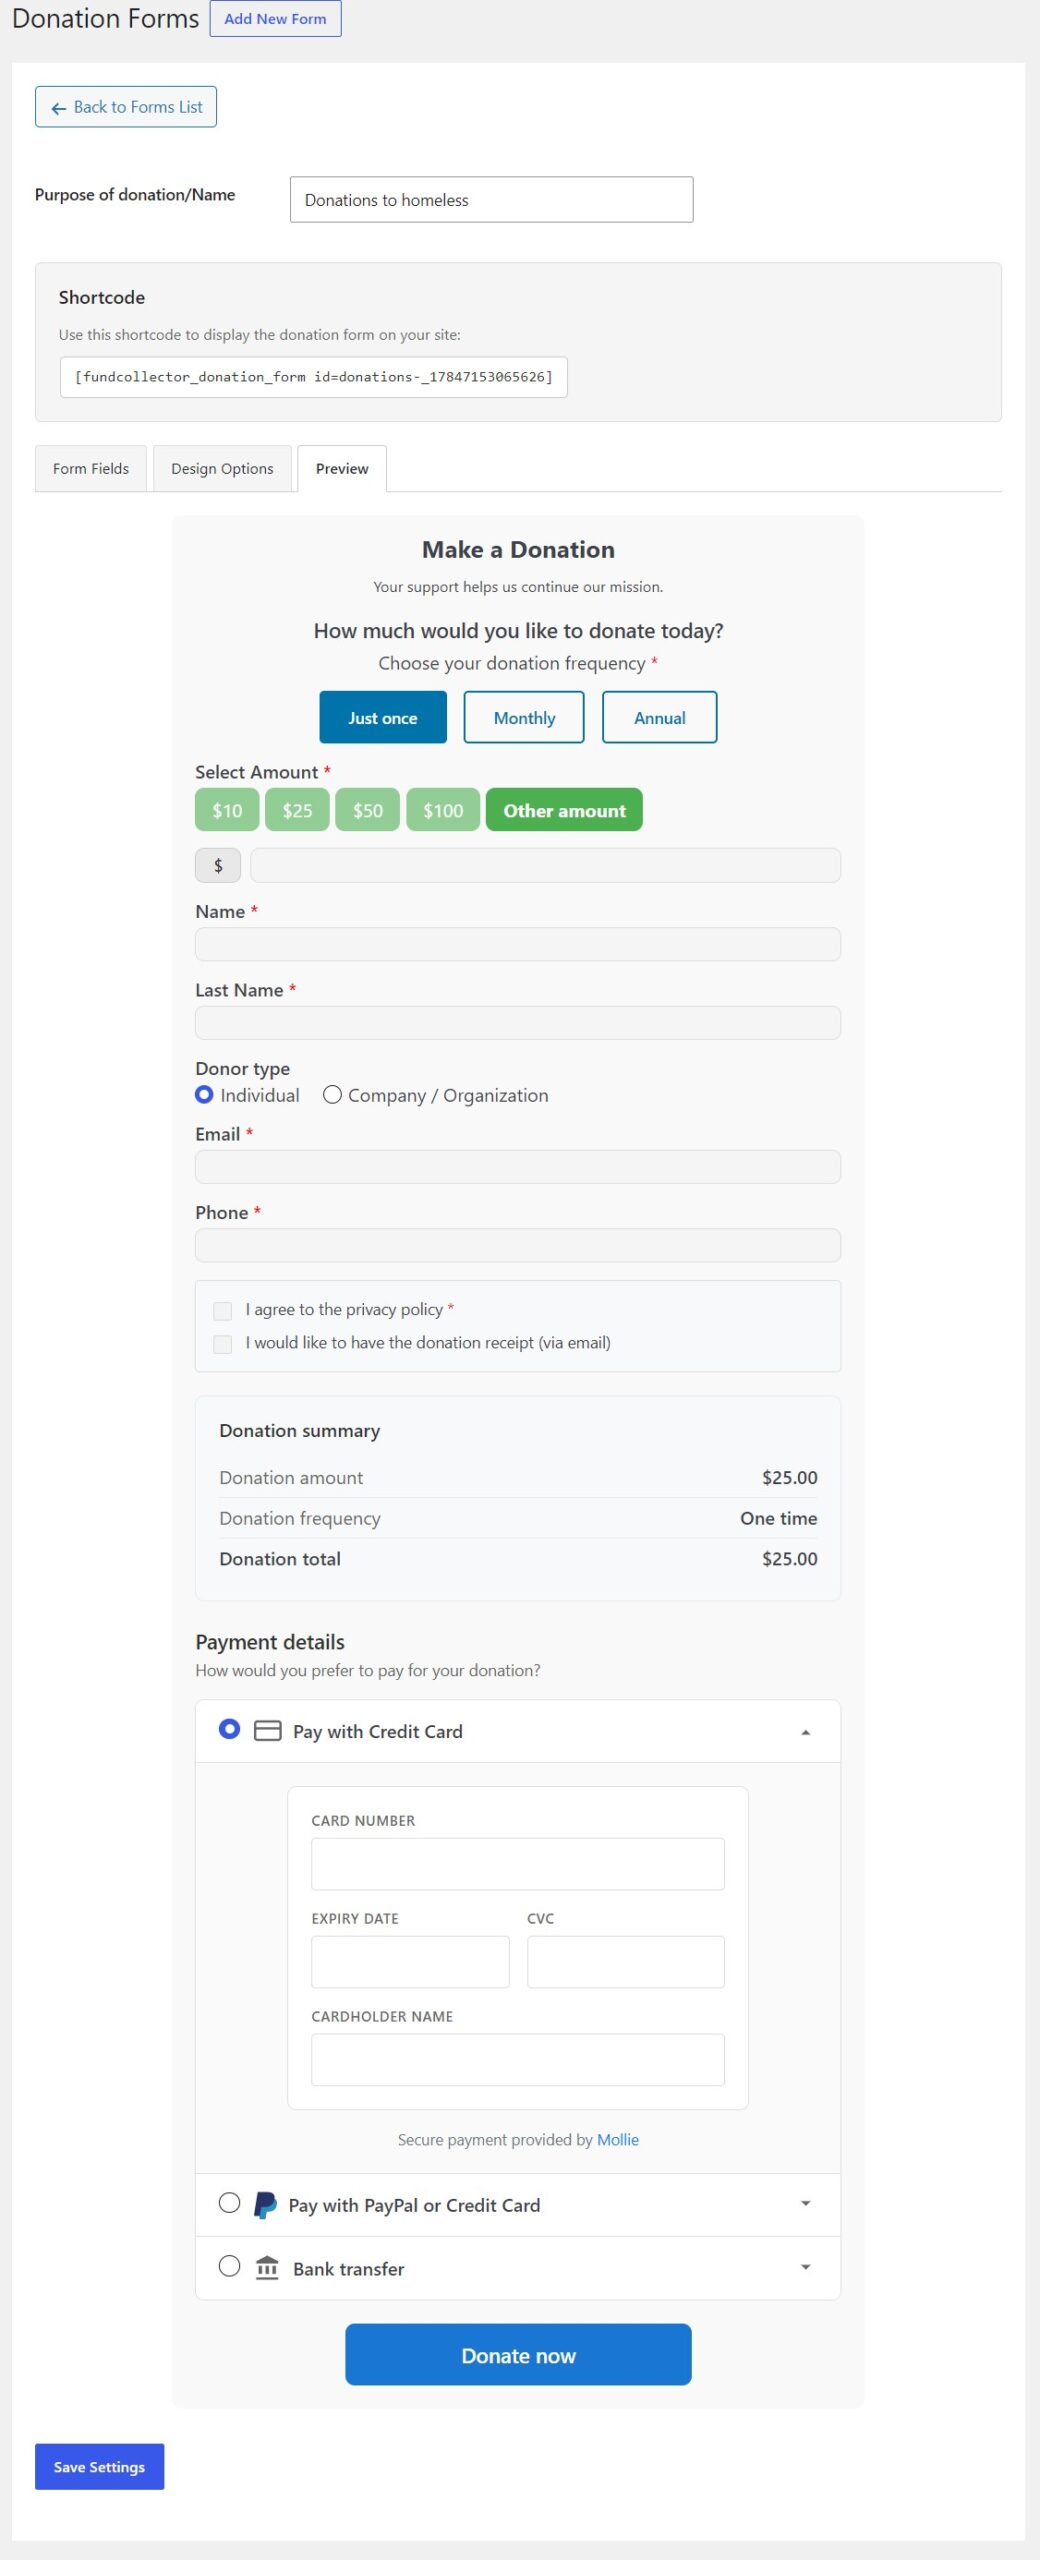
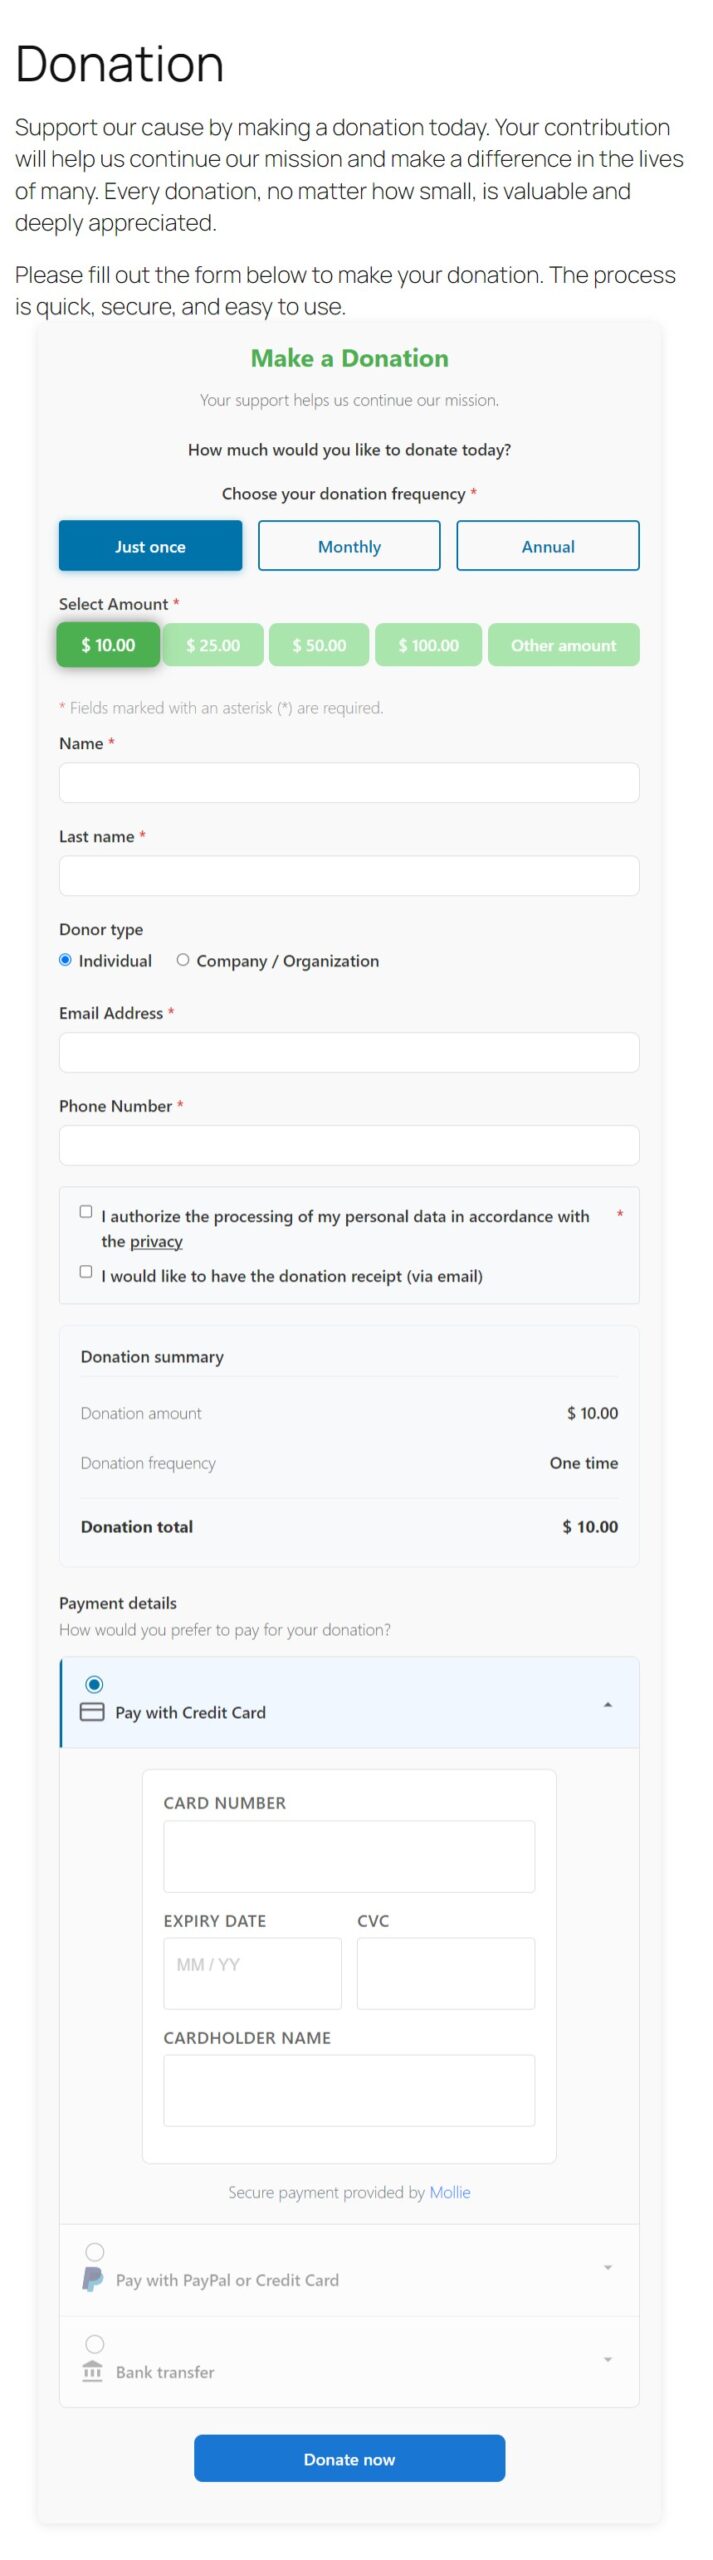
Tab: Preview
Preview renders an approximate version of the form inside the admin, including:
- Title and secondary text.
- Amount buttons and custom amount area.
- Visible donor fields and donation summary.
- Payment details reflecting enabled payment methods in plugin settings (PayPal and/or bank transfer; FundCollector Pro may add Mollie / card UI). PRO
- Privacy checkbox (if enabled).
- Donate now button (disabled in preview).
If no payment method is enabled, a warning appears instead – enable at least one method under FundCollector → Settings before expecting a full preview.
Free version

Pro version PRO
Recurring donations preview PRO
With FundCollector Pro and recurring donations enabled for PayPal and/or Mollie, Preview also shows the card payment section (when applicable) and the Just once, Monthly, and Annual frequency options.
Save and embed the form
Click Save Settings at the bottom of the editor. A green notice confirms that the settings were saved.
Place the form on the site with the Donation Form Gutenberg block, or use its shortcode.
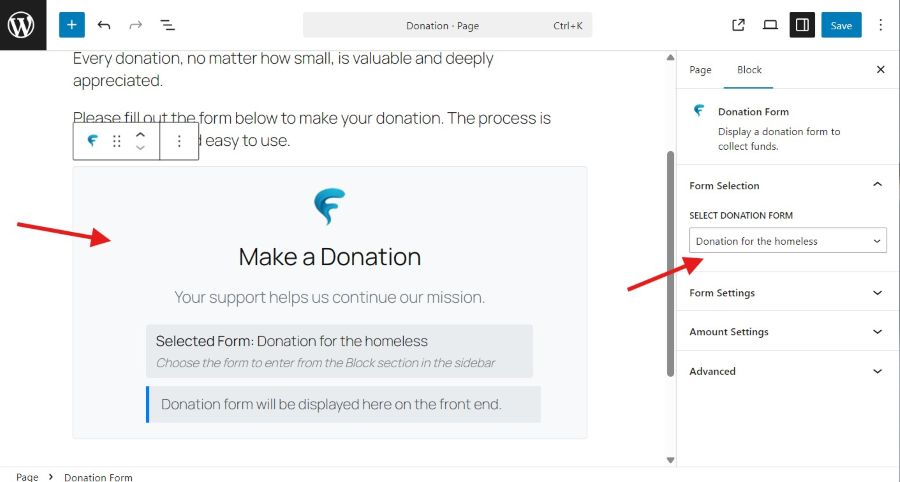
Block Editor (Gutenberg)
- Open the page or post where you want the form (or create a new one).
- Add a block: click + and search for Donation Form, or open the Fundcollector block category and choose Donation Form.
- Click the block in the editor canvas so it is selected.
- In the right-hand sidebar, make sure you are on the Block panel (icon with two sliders), not the Page/Post document panel.
- Open the Form Selection section (it is expanded by default). In Select Donation Form, pick the form you want from the dropdown. The list uses the same names as FundCollector → Forms.
- If you choose an inactive form, the sidebar shows a warning that it will not appear on the front end – set the form to Active under Forms or pick another form.
- Click Save or Update, then view the page on the front end to confirm the donation form loads.
The Form Settings section in the same sidebar (collapsed by default) lets you change text and amount options for this block only (for example title, description, suggested amounts). Which form is loaded – and its fields and colours – still comes from Form Selection and FundCollector → Forms; many sites only adjust Select Donation Form and leave Form Settings as they are.
Shortcode (alternative)
- Copy the shortcode from FundCollector → Forms (Copy next to the shortcode) or from the form editor.
- In the Block Editor (Gutenberg), add a Shortcode block (or use the Classic Editor / a shortcode-ready widget) and paste the shortcode, e.g.
[fundcollector_donation_form id=your_form_id].

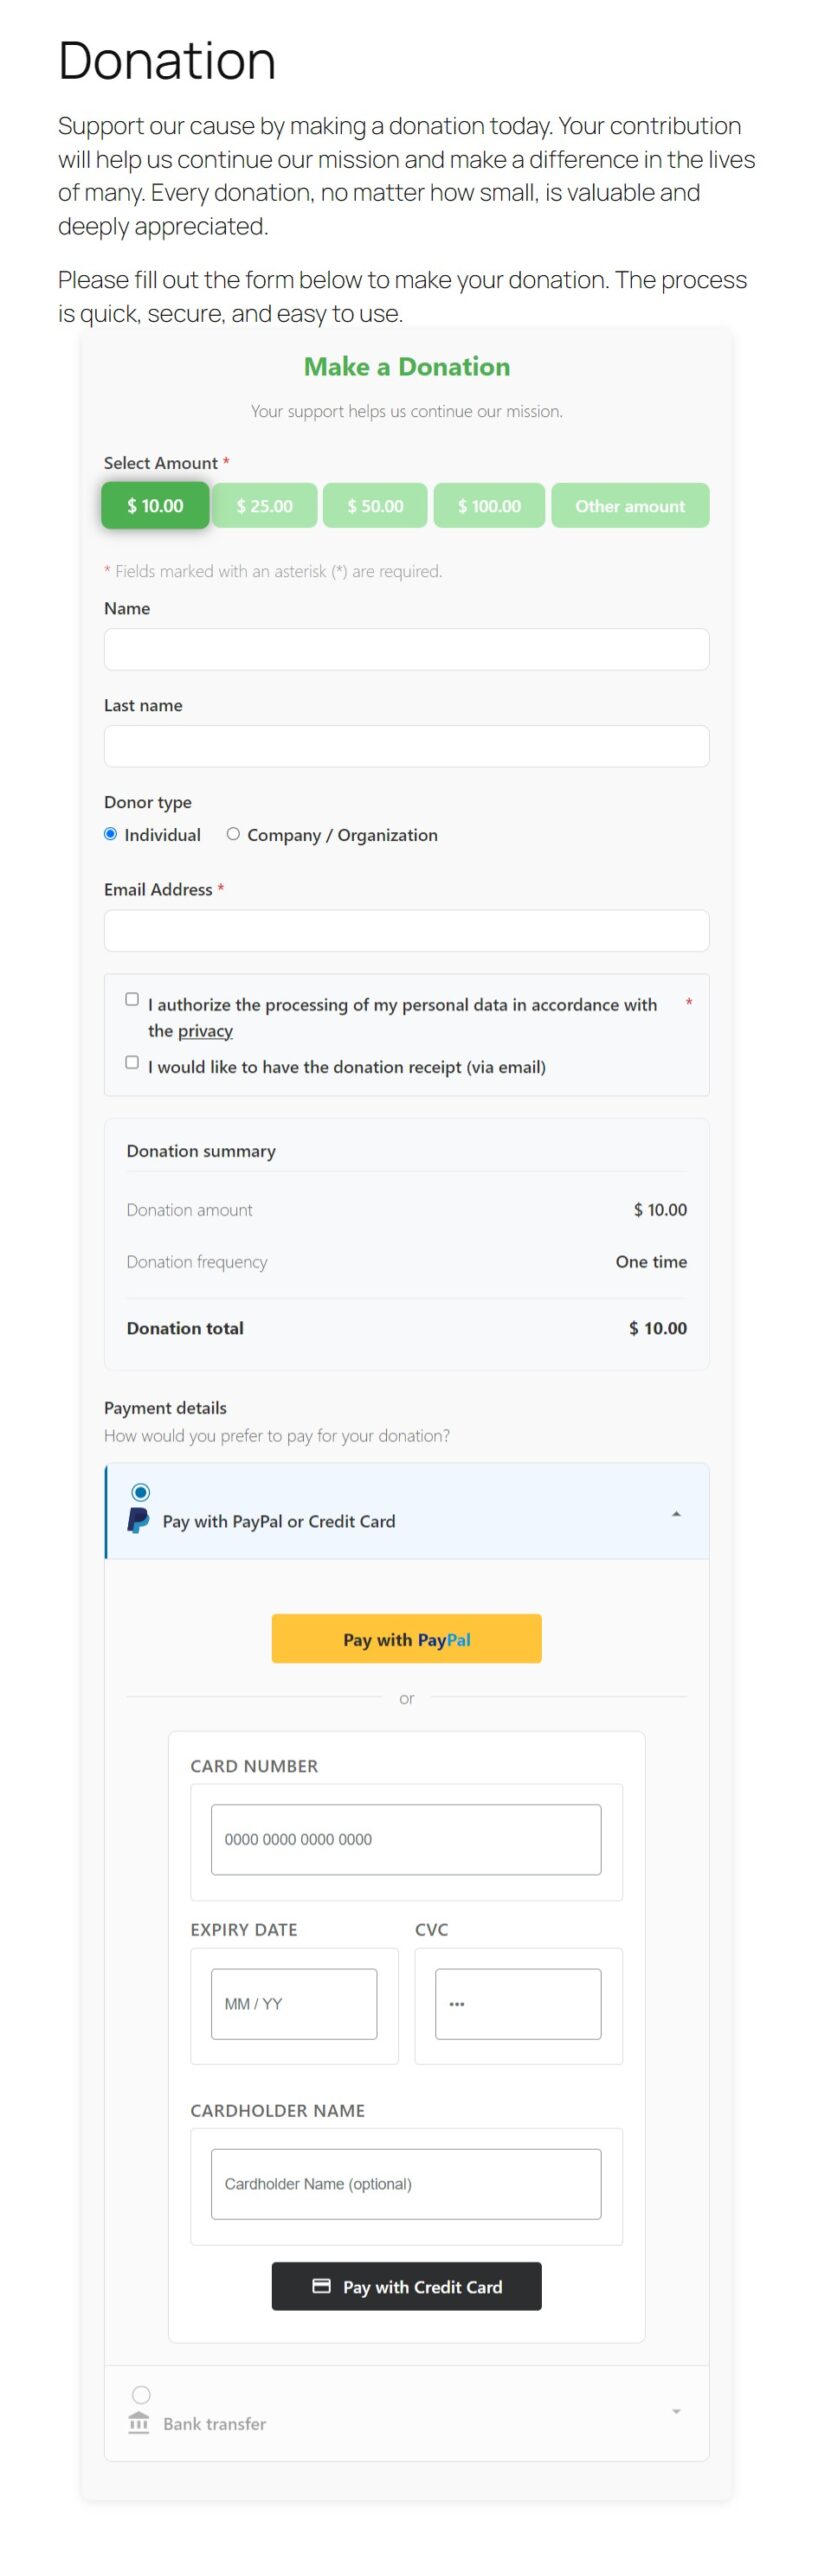
Front end
After saving the page or post, visitors see the donation form on your public site.
Free version
Pro version PRO
Related settings
- Payment methods, including PayPal and bank transfer in Free and Mollie in Pro, are configured under FundCollector → Settings.
- Currency and other global settings affect the displayed amounts and symbols.