
Note: This documentation covers both the Free and Pro versions of FundCollector. FundCollector Pro requires the Free version to be installed and kept active at all times. Sections that apply only to Pro are marked with PRO.
Reports PRO
The Reports screen creates reports from the donations stored in FundCollector: a ready-to-print PDF summary or a spreadsheet-friendly CSV export for Excel or Google Sheets. This feature is exclusive to FundCollector Pro.Overview
On Reports you can:- Generate a PDF summary with aggregated donation totals, averages, and breakdowns for the selected period.
- Export a CSV file containing the individual donation records that match the selected filters, compatible with Excel and Google Sheets.
- Apply the same working filters to both outputs: date range, payment status, payment gateway, and donation frequency.
Open the Reports page
- Log in to your site’s WordPress admin.
- In the left menu, open FundCollector.
- Click Reports.
admin.php?page=fundcollector-pro-reports).
Tabs
At the top of the content area there are two tabs:- PDF Reports: generate a formatted, aggregated summary.
- CSV Export: download the matching donation records as a data file.
PDF Reports tab
Open this tab when you want a printable summary instead of a spreadsheet.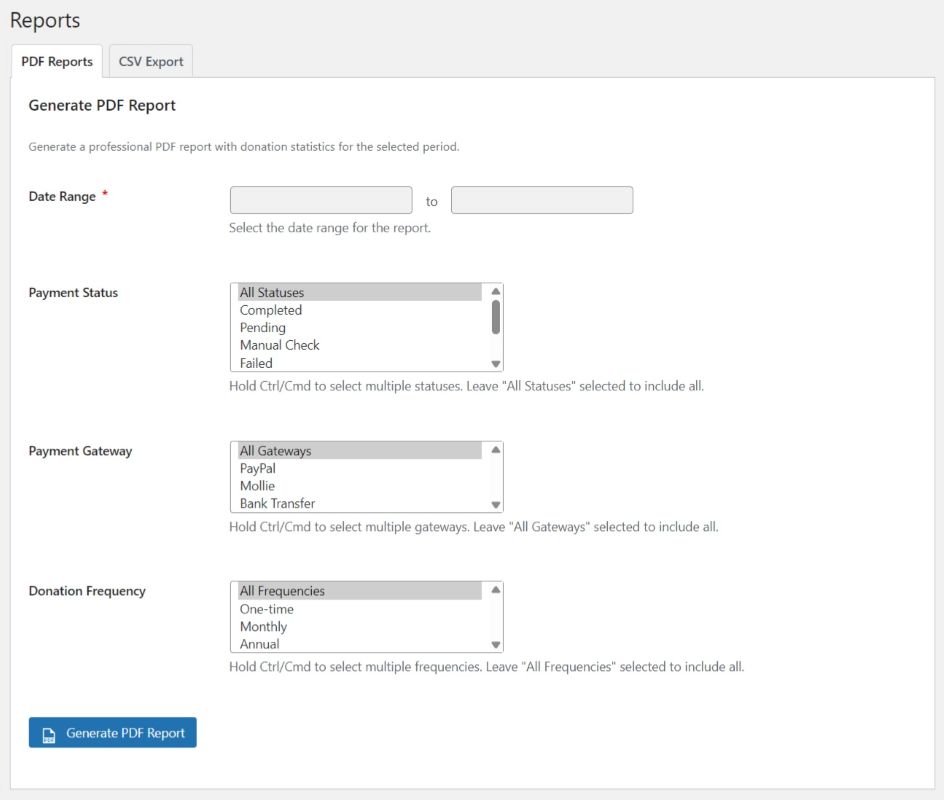
What it does
- Generates a professional PDF summary for the period and filters you select.
- The report aggregates the matching donations by currency and includes total donations, total amount, average donation, donation frequency, and payment method breakdowns.
- The file opens or downloads directly in your browser when you click the button.
Date Range
- Two date fields, from and to, let you pick the start and end of the period covered by the report.
- Both fields are required (marked with a red asterisk).
- Clicking a field opens a date picker.
Payment Status
- A scrollable list box showing all available statuses: All Statuses (default), Completed, Pending, Manual Check, Failed, Cancelled, Refunded, Expired.
- You can select multiple statuses by holding Ctrl (Windows/Linux) or Cmd (Mac).
- Leaving All Statuses selected includes every status in the report.
Payment Gateway
- A scrollable list box showing the available gateways: All Gateways (default), PayPal, Mollie, Bank Transfer.
- You can select multiple gateways with Ctrl/Cmd.
Donation Frequency
- A scrollable list box showing the available frequencies: All Frequencies (default), One-time, Monthly, Annual.
- You can select multiple frequencies with Ctrl/Cmd.
Generate PDF Report
- A blue Generate PDF Report button (with a small document icon) starts the process.
- The plugin applies every selected filter before calculating the PDF totals and breakdowns. If no donations match, the PDF states that no donations were found.
CSV Export tab
Open this tab when you want a data file for Excel, Google Sheets, or other tools.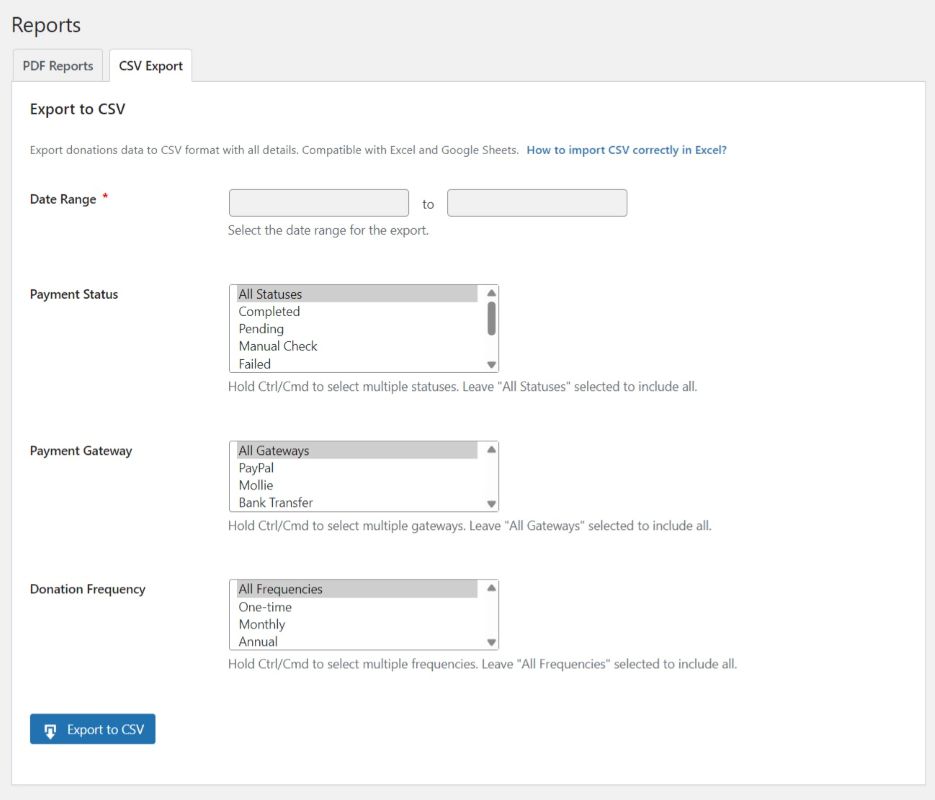
What it does
- Exports one row for each donation record that matches the selected period and filters, with all available details.
- The file is compatible with Excel and Google Sheets.
- A link “How to import CSV correctly in Excel?” is shown next to the description.
Date Range, Payment Status, Payment Gateway, Donation Frequency
The filters work exactly the same as on the PDF Reports tab. The CSV contains only the donation records that meet all of the selections.Export to CSV
- A blue Export to CSV button triggers the download.
- The browser will prompt you to save the
.csvfile (or download it automatically depending on your browser settings).
How to import CSV in Excel
The main concern is leading zeros in fields like postal codes, phone numbers, and tax IDs. Excel tends to strip them when you double-click a CSV file.Correct method (recommended)
- Open Excel with a blank workbook.
- Go to the Data menu and choose From Text/CSV.
- Select the downloaded CSV file.
- In the import window, click Transform Data or Edit.
- For the Phone, Postal Code, and Tax ID columns: select the column and change its type from Number to Text (the ABC icon).
- Click Close & Load.
Incorrect method (avoid)
- Do not open the CSV by double-clicking it. Excel will automatically interpret numeric-looking values and remove leading zeros (for example,
00144becomes144).