
Note: This documentation covers both the Free and Pro versions of FundCollector. FundCollector Pro requires the Free version to be installed and kept active at all times. Sections that apply only to Pro are marked with PRO.
Backup & Restore PRO
The Backup & Restore screen lets you manually save a copy of your FundCollector data to your computer and bring that copy back later, for example before major changes, when moving to another site, or after a server problem. This feature is exclusive to FundCollector Pro.Overview
On Backup & Restore you can:- Export a single compressed file containing FundCollector data, including donations, donors and donor details, recurring subscriptions, forms and form designs, saved plugin settings, and temporary transaction data.
- Import a file you exported earlier, choosing whether to replace everything or merge new records into what you already have.
Security note: Treat backups like sensitive documents: they can contain personal and payment-related information. Store them somewhere safe and do not share them publicly.
Open the Backup & Restore page
- Log in to your site’s WordPress admin.
- In the left menu, open FundCollector.
- Click Backup & Restore.
admin.php?page=fundcollector-pro-backup).
Tabs
At the top of the content area there are two tabs:- Export Backup: create a file and download it.
- Import Backup: upload a file and restore or merge data.
Export Backup tab
Use this tab when you want a fresh snapshot of your data on your computer.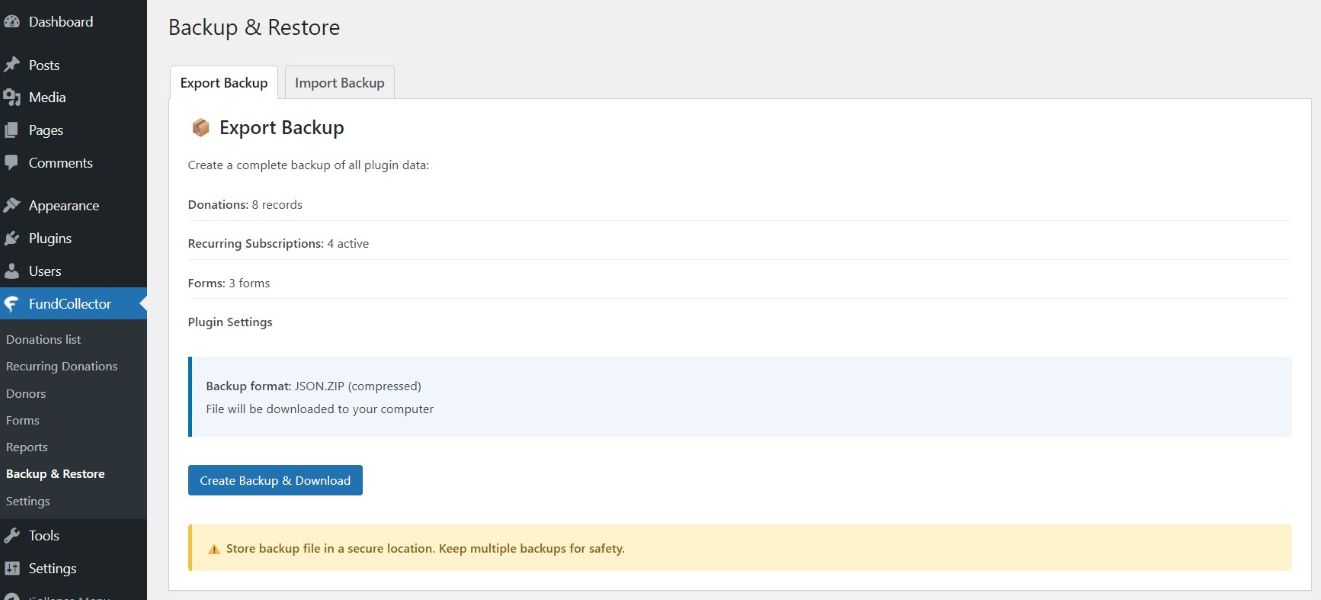
What the page shows before you export
- A short line explains that you are creating a complete backup of all plugin data.
- A small summary lists live counts (numbers update when you load the page):
- Donations: how many donation records will be included.
- Recurring Subscriptions: how many active recurring subscriptions are shown in the summary.
- Forms: how many donation forms are included.
- Plugin Settings: settings are part of the backup, with no separate count.
- Under Backup format, the page states that the file is JSON.ZIP, a compressed archive that is downloaded to your computer.
Create Backup & Download
- The main blue button is labelled Create Backup & Download.
- When you click it, the plugin builds the backup on the server. A short in progress state may appear while the file is prepared.
- When ready, your browser starts a normal file download. The downloaded name follows a fixed pattern: it starts with
fundcollector-backup-, then the date and time, then a short random part, and ends with.json.zip. - After the operation, a green or red notice on the page tells you if the backup was created successfully or not; on success it may also show the exact filename and an approximate size of the downloaded package.
- The backup package has a maximum size of 50 MB. If the data would create a larger file, the plugin refuses to create the download and shows an error instead of a broken file.
Import Backup tab (Restore)
Use this tab when you already have a.json.zip backup file from this plugin and want to load it into the current site.
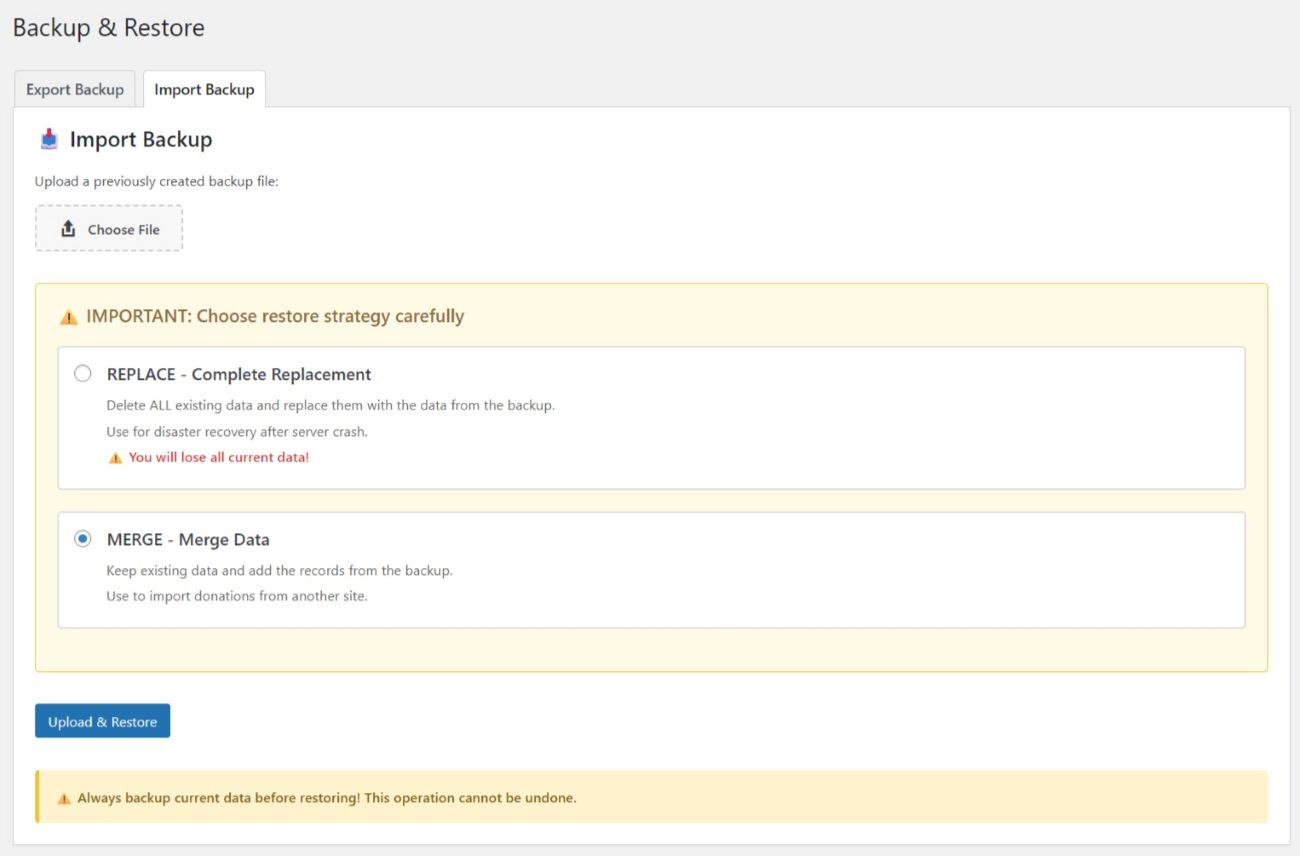
Choose a file
- Instructions ask you to upload a backup file created earlier with this same tool.
- You use a Choose File control. Choose the
.json.zipfile created by FundCollector. The upload control accepts ZIP archives and the restore process validates the backup before importing it. - There is a maximum file size for the upload (about 50 MB). Larger archives cannot be imported through this screen.
- After picking a file, its name usually appears next to the control so you can double-check you selected the right archive.
Restore strategy (read carefully)
Before restoring, you must pick one of two modes using radio buttons:- REPLACE – Complete Replacement
- What it does: removes all existing FundCollector data on this site and replaces it with what is inside the backup.
- When it is meant for: serious recovery situations, for example after a server crash, when you want the site to look exactly like the backup.
- Risk: the page warns clearly that you will lose all current data on this site for the data covered by the backup.
- MERGE – Merge Data (selected by default)
- What it does: keeps what you already have and adds records coming from the backup.
- When it is meant for: bringing in donations (or related data) from another installation without wiping the live database first.
Upload & Restore
- The blue Upload & Restore button sends the file and runs the import with the strategy you selected.
- If you did not choose any file yet, the page asks you to select one first.
- While the server works, an in progress indicator may appear.
- When finished, a result message shows whether the restore succeeded or what went wrong.
- On success, the message can include a short summary (for example how many donations and forms were brought in, how many lines were skipped because they already existed, whether settings were updated, and similar). Extra warnings may appear in a list if something needed your attention without failing the whole job.
- On failure, the message explains the problem when possible; sometimes a list of errors or warnings is shown with more detail.
Confirmation for REPLACE
- If you chose REPLACE, the browser shows a confirmation dialog before the destructive step runs. You must confirm that you understand current data will be removed.