

WordPress setup
How to Create a Donation Form in WordPress with FundCollector
In this guide we explain how to create a donation form in WordPress using FundCollector, a WordPress donation plugin. You do not need to write code or hire a developer. We cover installation, form configuration, payment setup, placing the form on a page and testing the first donation.
What you need before you start
Before creating the form in FundCollector, confirm that you have the following in place:
- A WordPress site running on HTTPS (the padlock icon in the browser). Donation forms must run on a secure connection, and PayPal requires it for live payments.
- A payment account to receive money. For PayPal, this means a PayPal Business account. For bank transfer, the account details you want to show donors.
- An email address that can receive admin notifications when a donation is submitted.
If your site is still on HTTP, set up SSL first. Most hosting providers include a free SSL certificate (Let’s Encrypt) that you can activate from the control panel.
Installing FundCollector
Install FundCollector from the WordPress plugin directory. In your WordPress Admin panel, go to Plugins > Add New Plugin, search for FundCollector, then click Install and Activate.

The free version is available on WordPress.org and includes PayPal, bank transfer, customizable forms, donor records and confirmation emails. After activation, FundCollector adds its menu to the WordPress Admin sidebar.
Configuring the donation form
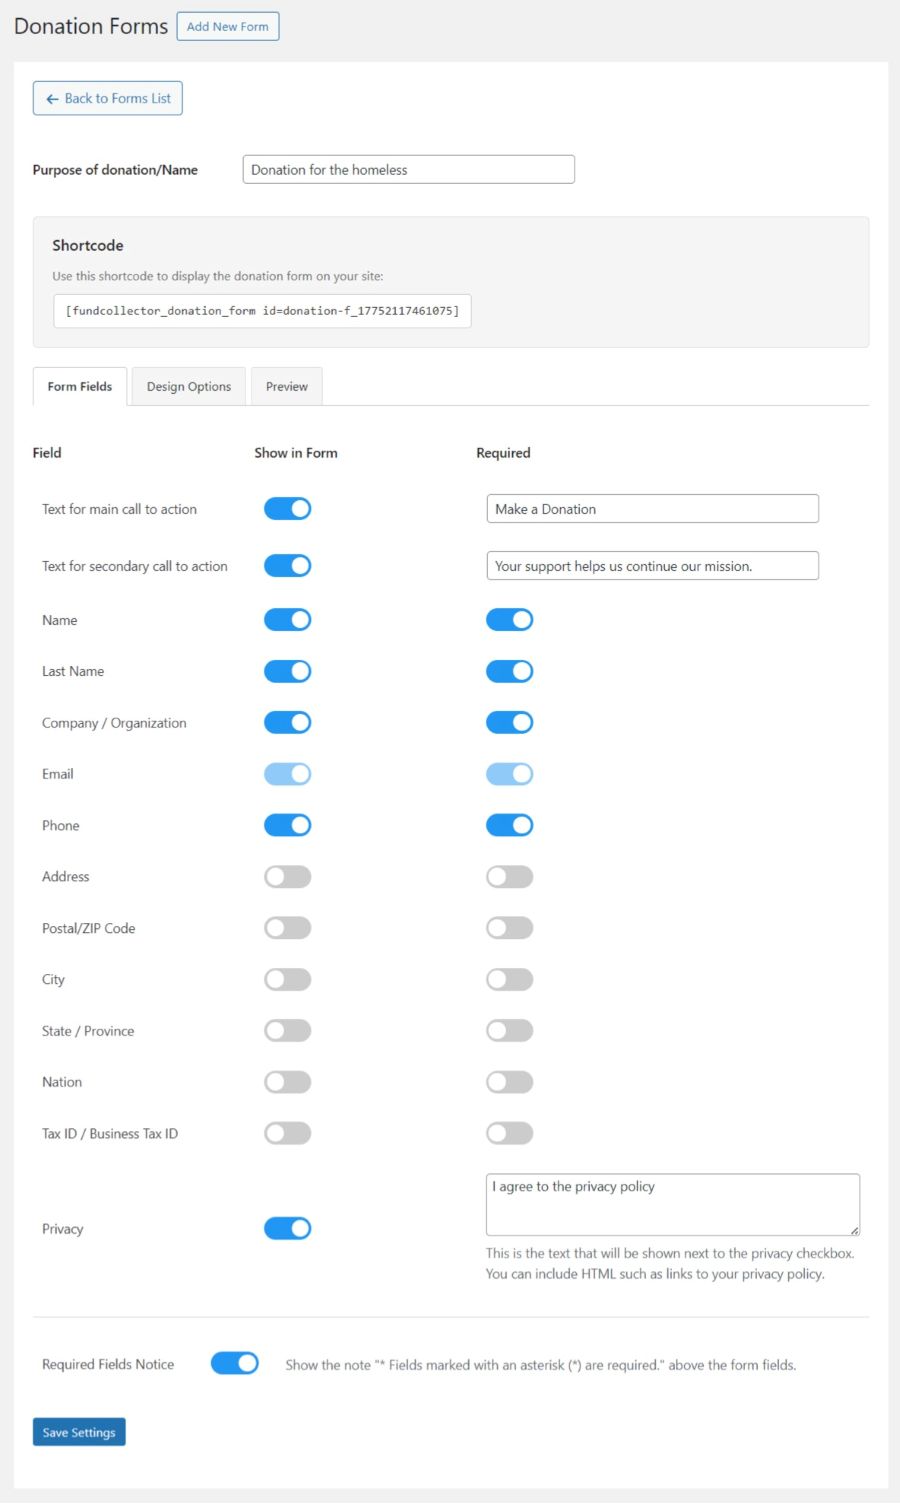
In FundCollector, create one or more donation forms. Each form has settings for:
- Preset donation amounts – the suggested figures donors can click rather than type. Three or four options work well. Set amounts that reflect what is genuinely useful for your cause.
- Custom amount option – allows donors to type their own figure. Leave this enabled alongside the presets.
- Required fields – at minimum, name and email. Only add other fields if you have a specific reason.
- Form title and description – a short explanation of what the donation supports. Keep it to two or three sentences.
Save the form configuration before moving on to the payment settings.
Connecting a payment method
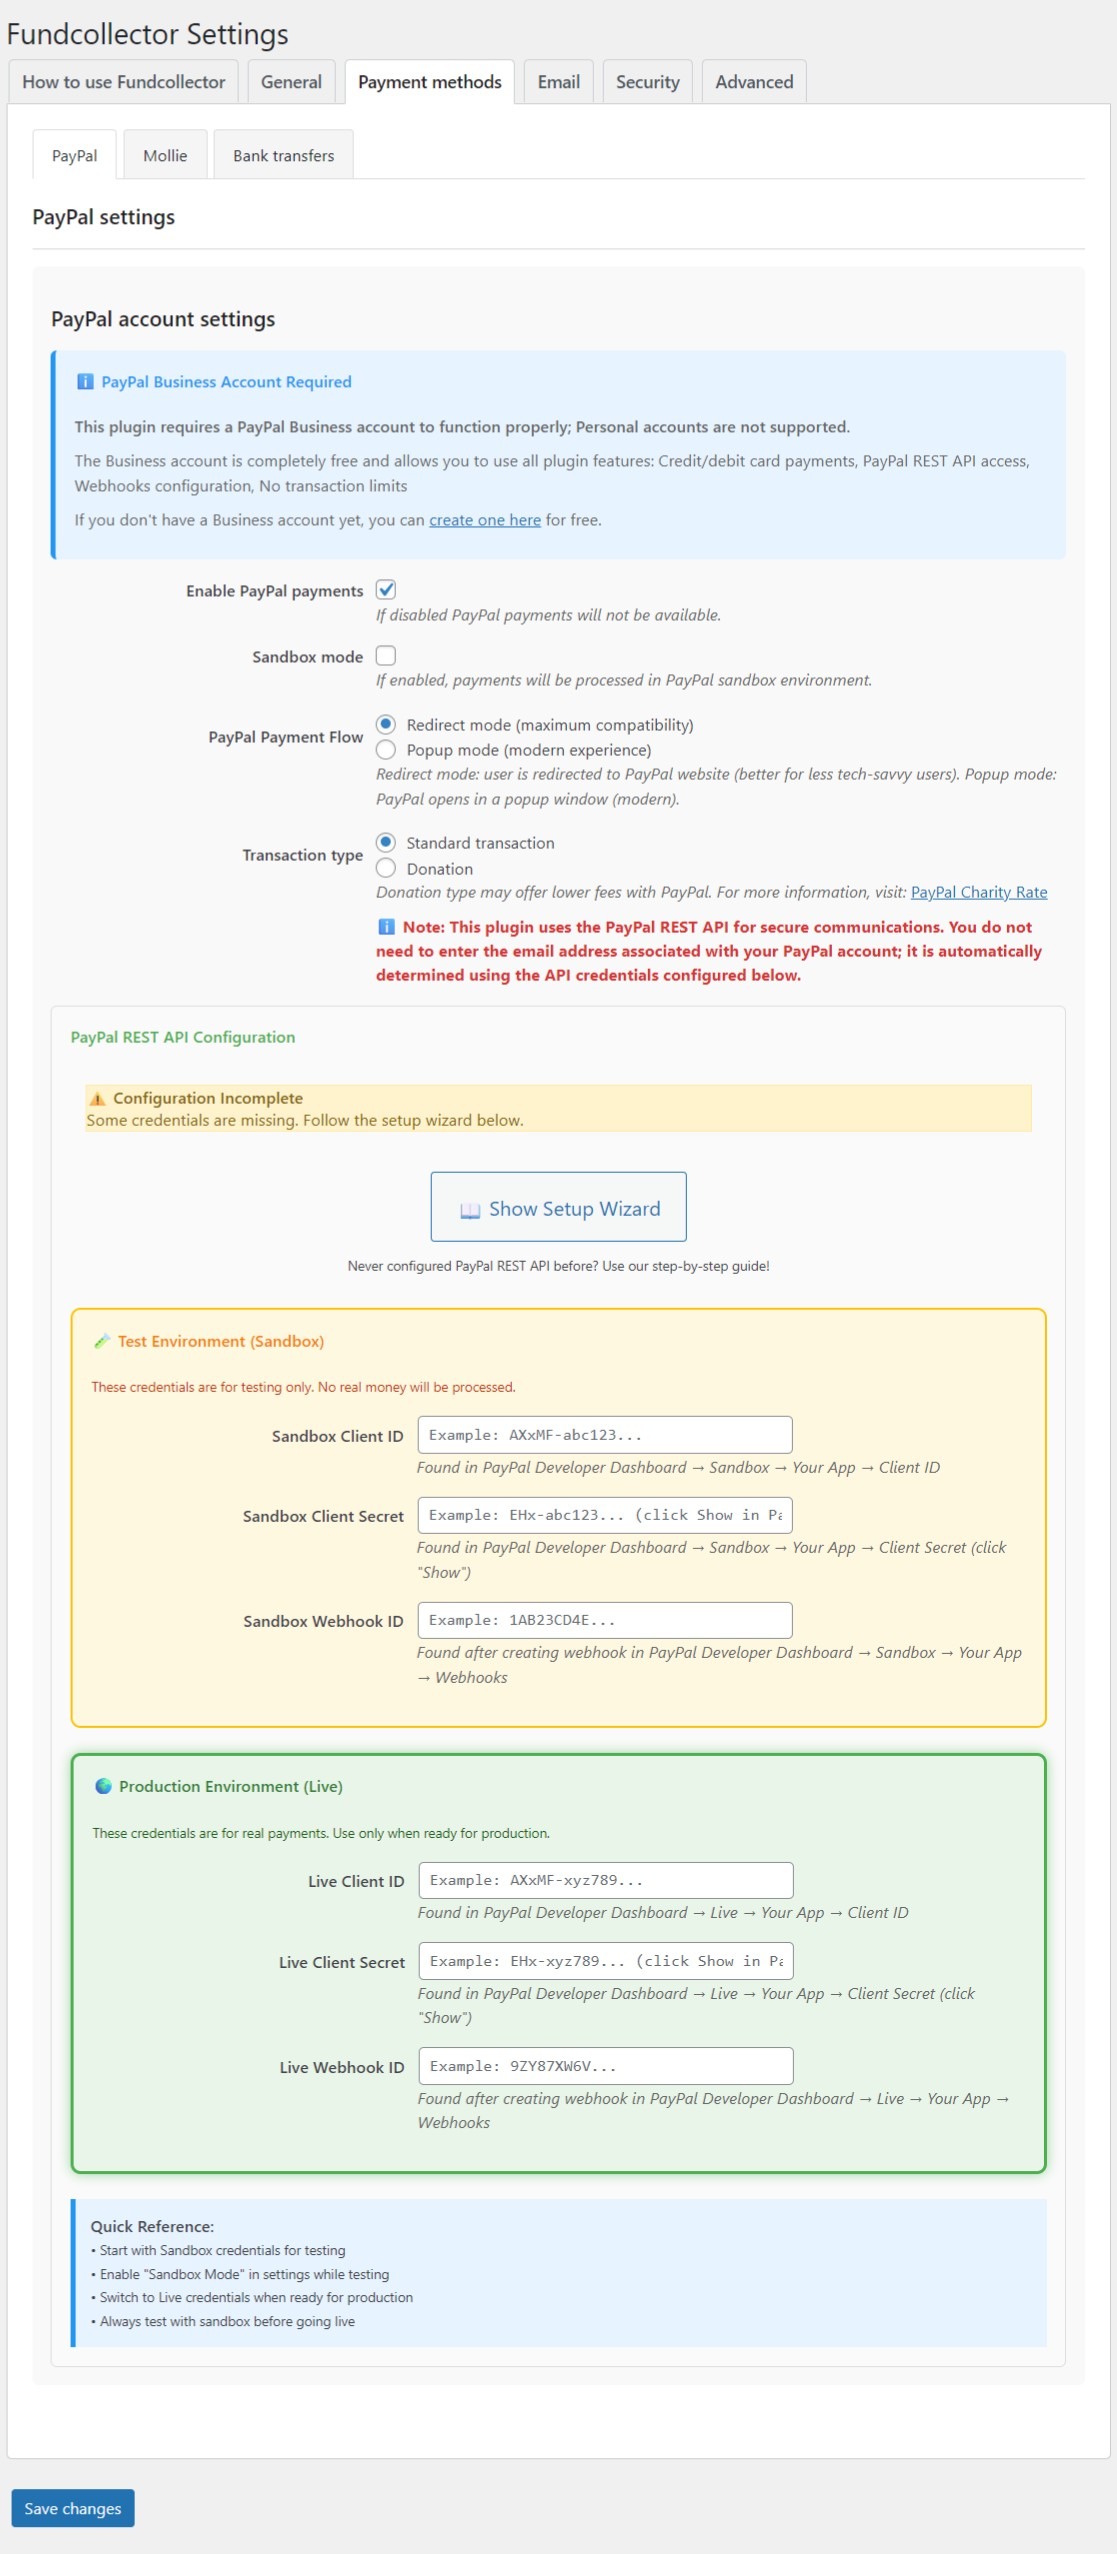
In FundCollector, open the payment settings and enter the credentials for your gateway. For PayPal, this means the Client ID, Client Secret and Webhook ID from the PayPal Developer dashboard. See the PayPal donation setup guide for the full credential process.
Enable Sandbox mode in FundCollector before going live. In sandbox mode, you can submit test donations without real money changing hands, which lets you verify the whole flow without risk.
FundCollector also supports bank transfer as an offline payment option. Configure your bank details in the plugin settings. FundCollector displays those details to donors who choose that payment method.
Adding the form to a page
Once the form is configured in FundCollector, place it on a WordPress page using one of two methods:
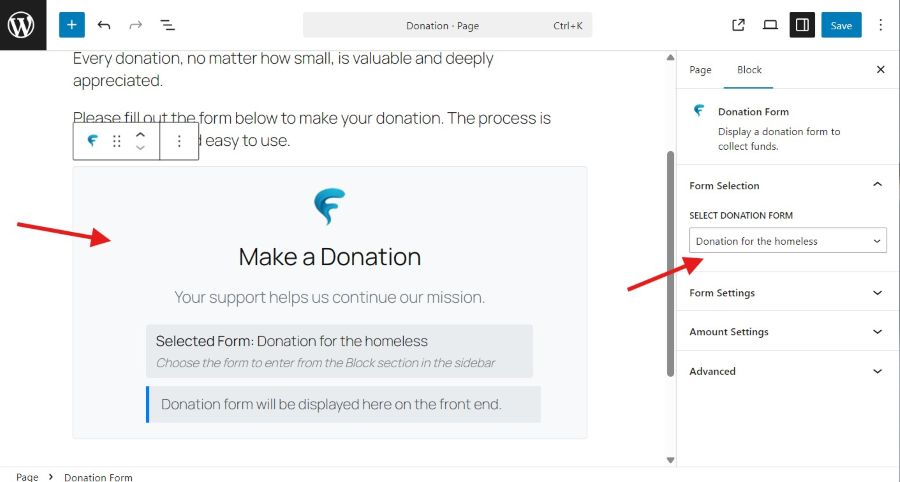
- Gutenberg block – in the block editor, add the FundCollector Donation Form block and select which saved form to display. This is the easiest method for sites using the standard WordPress editor.
- Shortcode – FundCollector provides a shortcode such as
[fundcollector_form id="1"]that you paste into any page or post. This works in both the classic editor and in a Custom HTML block in Gutenberg.
Create a dedicated page for the donation form rather than embedding it in an existing page. A standalone page is easier to link to, easier to track in analytics, and gives donors a focused experience without navigation distractions.
Testing before publishing
Before sharing the donation page with anyone, test it yourself:
- Submit a test donation using PayPal sandbox credentials with Sandbox mode enabled in FundCollector.
- Verify the confirmation screen appears after the payment.
- Check that you received an admin notification email.
- Open the FundCollector donations dashboard and confirm the test donation is recorded with the correct amount and donor details.
- Disable Sandbox mode, make a small real donation, and verify the same steps.
Only publish and promote the donation page after the live test passes. A form that looks ready but fails at the payment step will lose real donors and may require manual follow-up to address their concerns.