
WordPress setup
Add Donation Form with the Gutenberg Block in FundCollector
The block editor makes it simple to build donation pages without switching to code. FundCollector is the WordPress donation plugin used on this site to collect gifts, manage forms, process payments and keep donor records organized. When you place the FundCollector donation block on your page, you keep layout work in Gutenberg while payments, confirmations and donor records follow your FundCollector settings.
Why use a donation block in Gutenberg
Modern WordPress pages are built with blocks for paragraphs, headings and media. A donation block fits that workflow: insert it like any other block and keep your page structure consistent. With FundCollector, the block shows the donation form you saved in the plugin, so receipts and payment capture stay consistent with your form setup.
If you run multiple campaigns, you can reuse page layouts and swap which FundCollector form each block instance displays.
Before you start
To follow these steps, keep FundCollector installed and activated. Confirm you have at least one FundCollector donation form configured with a payment method. The free version on WordPress.org covers PayPal and bank transfer. Recurring donations require FundCollector Pro and work with PayPal or Mollie. Embedded credit card payments require FundCollector Pro with Mollie.
It also helps to decide where the donation form should live, for example a dedicated /donate page or a campaign landing page.
Step 1: Create or open the target page
In the WordPress admin, open the Pages section and either create a new page or open the page where the donation form should appear. Give the page a clear title that reflects the campaign or the donation context, for example “Support Our Work” or the name of the specific campaign.
Add a short introductory paragraph that explains what the donation supports. A few clear sentences above the form help donors decide quickly whether they want to give.
Step 2: Insert the donation block
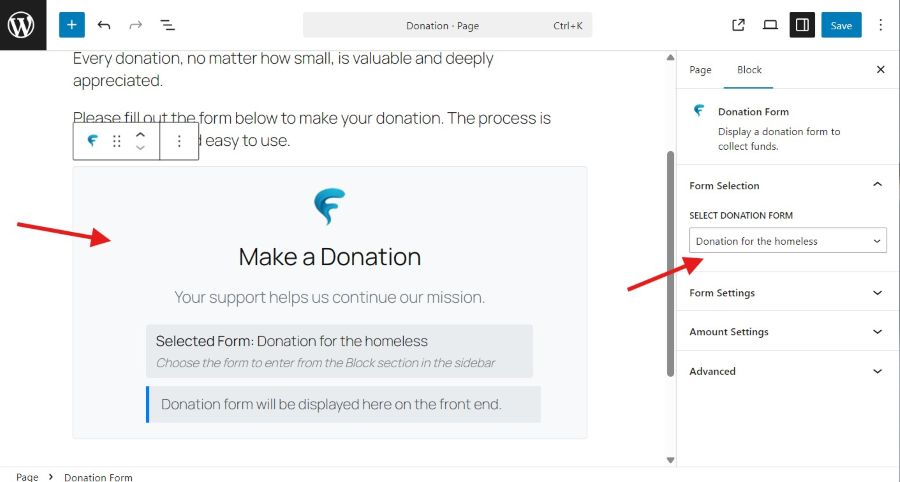
Open the block inserter from the toolbar, browse the FundCollector category, and add the Donation Form block. This is the FundCollector block that connects the page to your saved donation form.
In the block settings sidebar, select which stored donation form should display. If you have only one form it will usually be preselected; with multiple forms, choose the right one for this page before publishing.
Step 3: Preview the form before publishing
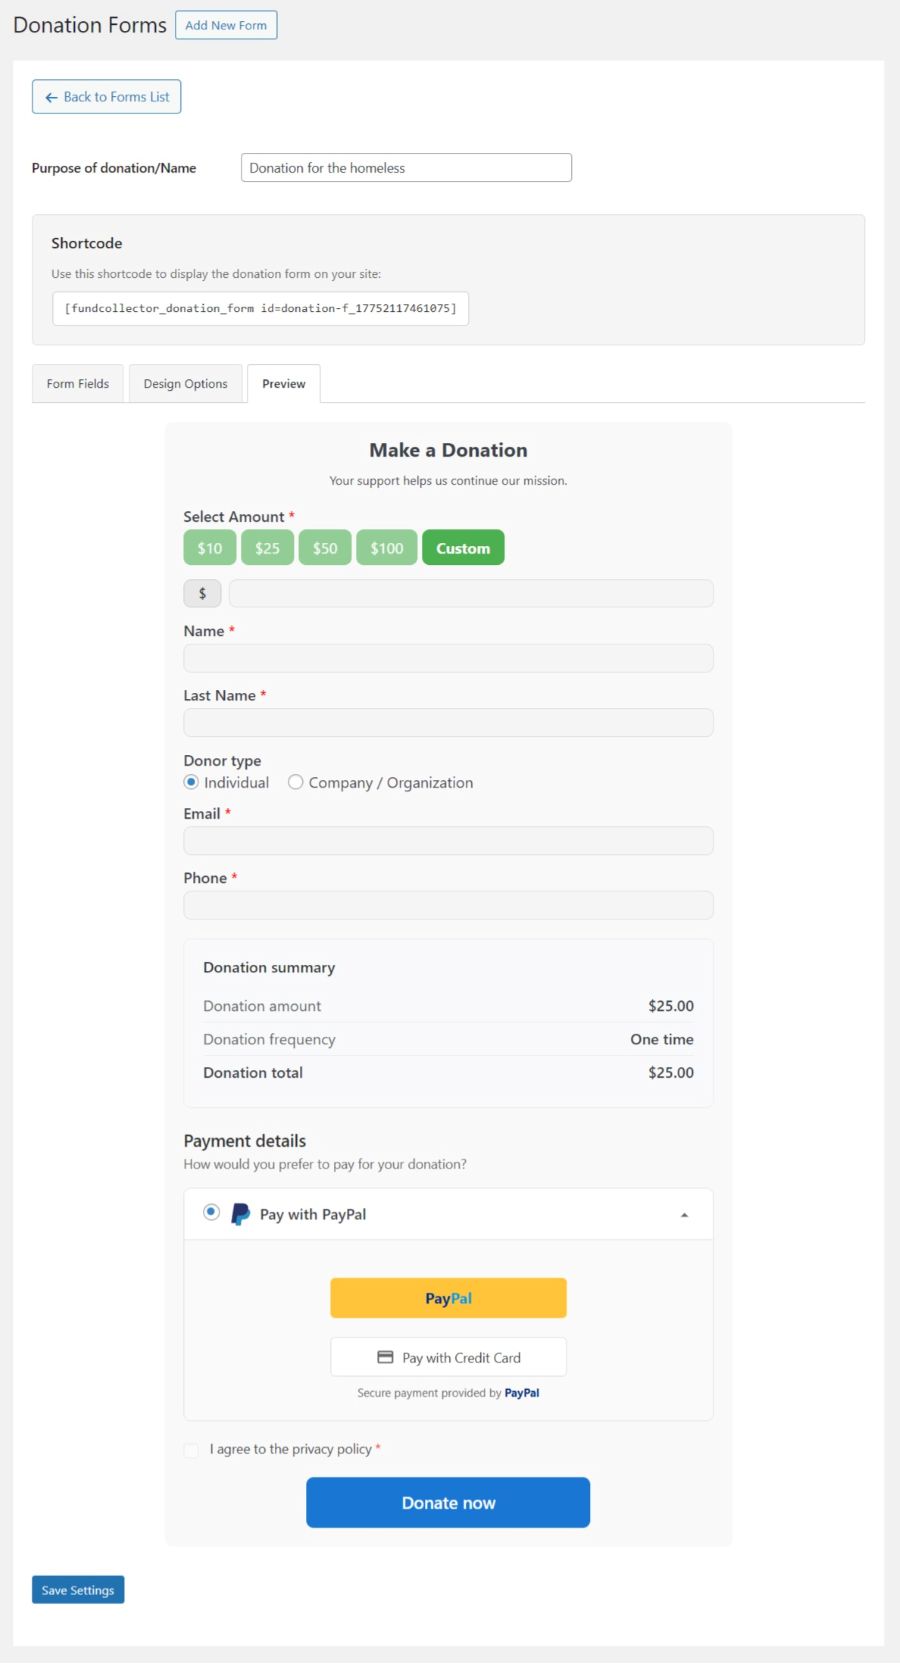
Before you publish the page, check the form in two places. First, open the donation form in FundCollector and switch to the Preview tab. This shows how the form will render with your current field, amount and payment settings, without leaving the WordPress admin area.
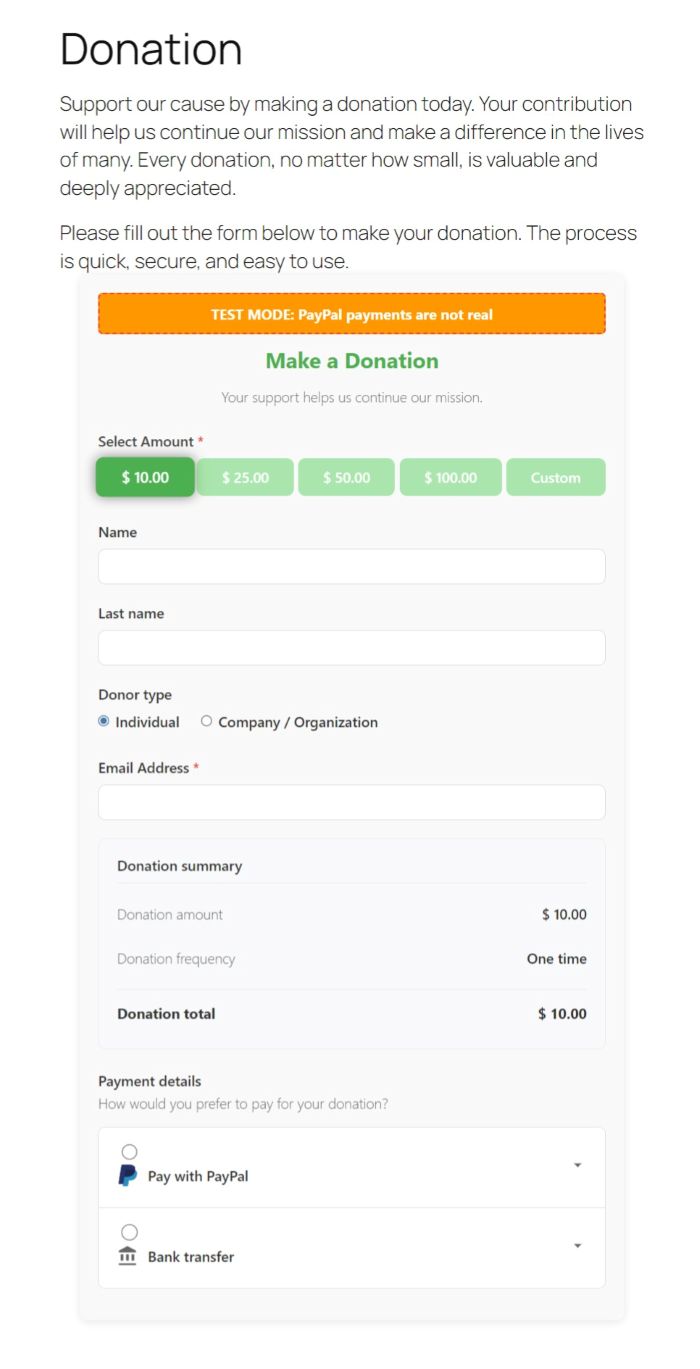
Second, use the Preview button in the block editor to open the page in a new browser tab as a logged-out visitor. This is the front-end view: the form embedded in your page layout, as donors will see it after you publish.
Check that suggested amounts and payment methods match your expectations, and that the layout looks good on both desktop and mobile screens. If something looks off, update the form configuration inside FundCollector settings instead of editing inside the block. The block should only reflect what you configured in the plugin.
The image below shows the donation form on the front end.
Step 4: Adjust the page layout around the form
The donation form does not have to stand alone. Combine it with other content blocks, for example an image of the project, a short story about who benefits, suggested impact amounts described in plain language, or a brief privacy statement near the form.
A two-column layout with a story on one side and the form on the other often works well on desktop. On mobile, blocks usually stack vertically, so make sure the form remains easy to reach without excessive scrolling.
Step 5: Publish and test a real donation
Once the page is ready, publish it and run a real test donation. If your gateway offers a sandbox mode, use it to complete the full flow without moving real money. Verify that the donation shows up in the FundCollector dashboard with the correct amount and status, and that confirmation emails arrive for both donor and administrator.
This last step helps catch small configuration issues before you share the page with supporters.
When to use the shortcode instead
Most current themes support blocks well. If your setup relies on classic editors or page builders that do not load native blocks cleanly, use the FundCollector shortcode to output the same form configuration.
Both approaches target the same front-end result, so choose what fits your editor workflow.
Creating multiple donation forms
Each block instance can point to a different stored form, which is useful when you run parallel campaigns. FundCollector supports multiple donation forms with separate configurations, suggested amounts and payment methods. Send one campaign page to one form, and your general donate page to another.
Pairing blocks with distinct form records keeps settings centralized instead of copying layout work. For more on fields, amounts and trust signals, see the donation form best practices guide.